If you’re searching for a fun, no-bake treat, Butterfinger Balls are the answer! These simple bites are easy to make and taste amazing. With creamy peanut butter and crunchy Butterfinger bars, each ball is pure bliss. In this post, I’ll show you step-by-step how to create these irresistible snacks. Get ready to impress your family and friends with a treat they’ll love! Let’s dive into the recipe and tips!
Why I Love This Recipe
- Easy to Make: This recipe requires minimal ingredients and is simple to prepare, making it perfect for both beginners and experienced bakers.
- Decadent Flavor: The combination of creamy peanut butter and crunchy Butterfinger creates a rich and satisfying treat that everyone will love.
- Versatile Treat: These balls can be enjoyed as a snack, dessert, or a thoughtful homemade gift for friends and family.
- Customizable: You can easily adjust the recipe by adding different toppings or using various types of chocolate for the coating.
Ingredients
Here’s what you need to make Butterfinger Balls. Gather these ingredients before you start:
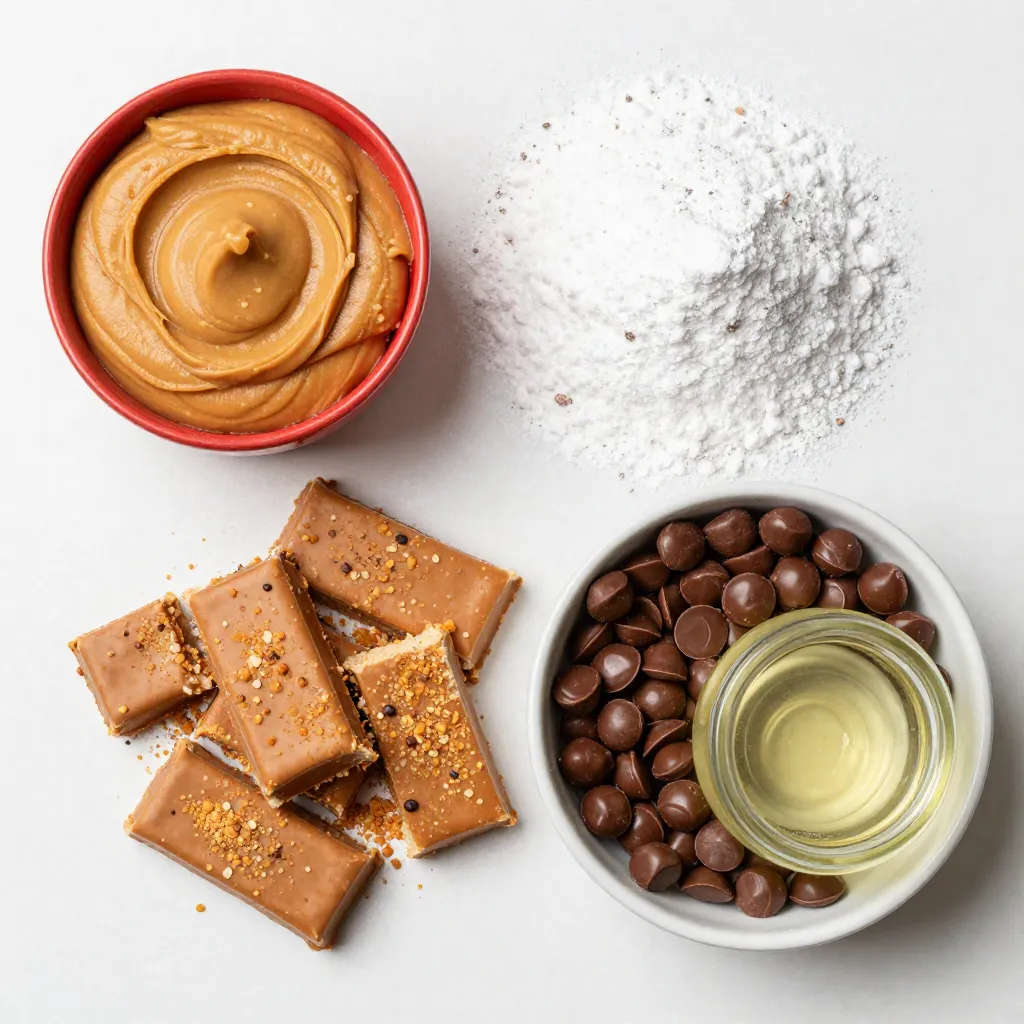
– 1 cup creamy peanut butter
– 1 cup powdered sugar
– 1 1/2 cups crushed Butterfinger candy bars
– 2 cups milk chocolate chips
– 1 tablespoon coconut oil (optional)
Each ingredient plays a big role in creating these tasty treats. The creamy peanut butter gives the balls a smooth texture. The powdered sugar sweetens and thickens the mixture. Crushed Butterfinger bars add a fun crunch and a burst of flavor. Milk chocolate chips provide a rich and sweet coating. If you use coconut oil, it helps melt the chocolate smoothly.
With these simple ingredients, you are on your way to making an easy and delicious no-bake treat. Enjoy the process and get ready for a sweet snack!
Step-by-Step Instructions
Preparation of Peanut Butter Mixture
To start, grab a large mixing bowl. Add 1 cup of creamy peanut butter and 1 cup of powdered sugar. Stir them together until the mixture is smooth and thick. This step is key for a great texture. Next, gently fold in 1 1/2 cups of crushed Butterfinger bars. Mixing these in adds a crunchy surprise to every bite, making it even more delightful.
Shaping and Chilling the Balls
Now it’s time to shape the mixture. Use your hands to form small balls, about 1 inch in diameter. Place each ball on a tray lined with parchment paper. This keeps them from sticking. After shaping, chill the balls in the refrigerator for about 30 minutes. Chilling is important. It helps the balls firm up, making them easier to handle later.
Melting and Coating in Chocolate
While the balls chill, prepare the chocolate coating. In a microwave-safe bowl, combine 2 cups of milk chocolate chips and 1 tablespoon of coconut oil if you want a smoother finish. Heat this mixture in the microwave in 30-second bursts. Stir in between until the chocolate is fully melted and silky.
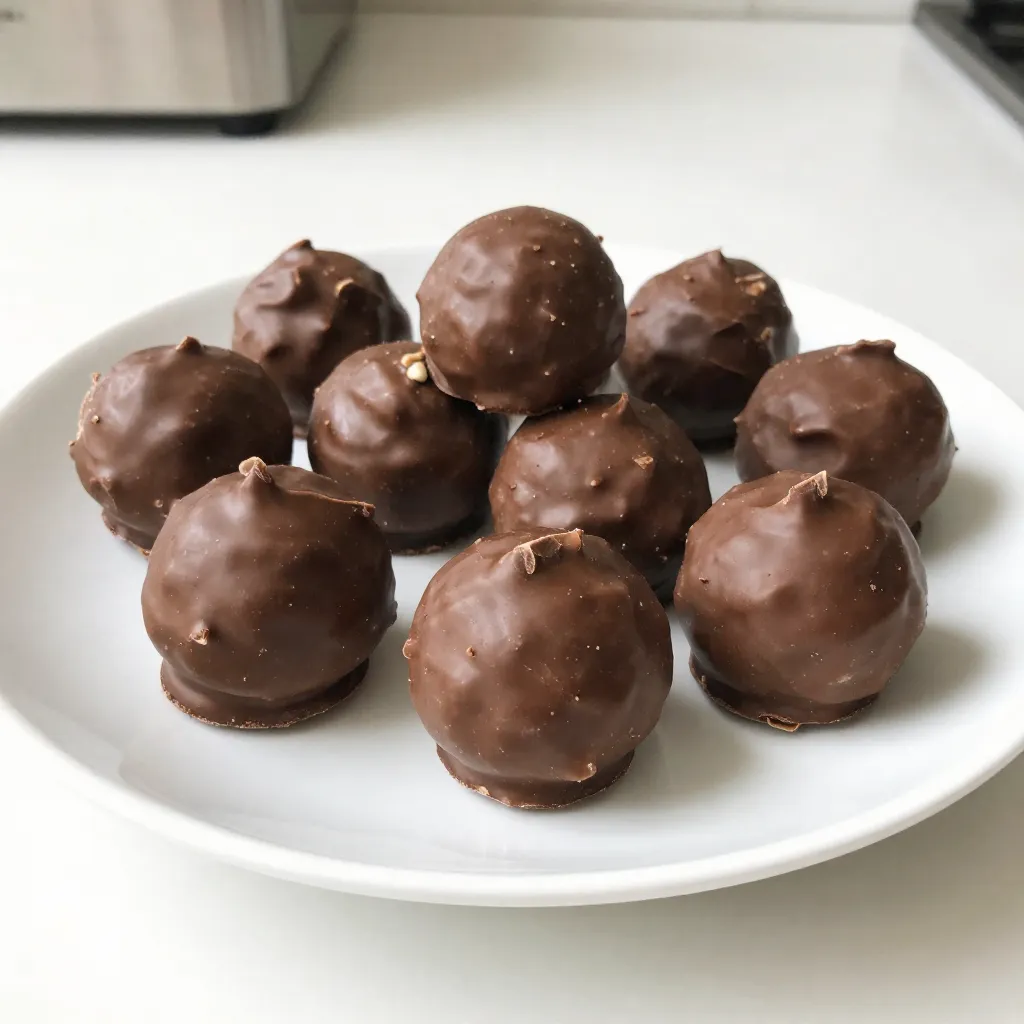
Once the balls are firm, it’s time to dip. Take each ball and dip it into the melted chocolate. Use a fork to lift them out, allowing any excess chocolate to drip off. Place them back on the parchment-lined tray. For a fun touch, sprinkle some crushed Butterfinger on top before the chocolate hardens. Let the chocolate set at room temperature or chill again for quicker results.
Tips & Tricks
Ensuring Smooth Chocolate Coating
To get a smooth chocolate coating, use coconut oil. This oil helps the chocolate melt evenly. It makes the final coating shiny and smooth. When melting the chocolate, do it slowly. Use a microwave in 30-second bursts. Stir in between to avoid burning.
When dipping the balls, use a fork. This way, you can lift the ball in and out easily. Let the excess chocolate drip off before placing it back on parchment paper. This keeps the coating neat and tidy.
Achieving the Right Texture
Chilling the balls is key for the best texture. After shaping them, chill for about 30 minutes. This step helps them become firm. If they are too soft, they might fall apart when you dip them.
For perfect-sized balls, aim for about 1 inch in diameter. This size ensures even coating and easy handling. Use your hands to roll them gently. This helps create a nice round shape.
Enhancing Flavor and Presentation
To make these treats even more special, garnish with crushed Butterfinger. Sprinkle it on top of the chocolate before it hardens. This adds flavor and a nice crunch.
For serving, arrange the Butterfinger Balls in a decorative box. A pretty dish makes them stand out at parties. They also work great as gifts. Everyone loves a homemade treat!
Pro Tips
- Chill the Mixture: Before shaping the balls, chill the peanut butter mixture for about 10 minutes to make it easier to handle and shape.
- Use High-Quality Chocolate: Opt for high-quality chocolate chips for coating to ensure a rich and smooth flavor that enhances the overall taste of the treats.
- Experiment with Coatings: Try rolling the chocolate-coated balls in crushed nuts, sprinkles, or coconut flakes for added texture and flavor.
- Store Properly: Keep the Butterfinger Delight Balls in an airtight container in the refrigerator to maintain freshness for up to a week.
Variations
Flavor Options
You can make Butterfinger Balls even more fun by changing the flavors. Try different candy bars for a unique twist. For example, use Snickers or Reese’s for added flavors. Each candy adds its own special taste.
You can also switch up the chocolate. Use white chocolate or dark chocolate for a new look and taste. White chocolate gives a sweet and creamy layer, while dark chocolate adds a rich, bold flavor. Both make great options!
Dietary Adjustments
If you need gluten-free treats, this recipe is easy to adapt. The main ingredients, like peanut butter and sugar, are gluten-free. Just make sure the chocolate chips you choose are also gluten-free.
For a vegan version, swap the regular chocolate chips with dairy-free ones. You can also use a nut butter or a seed butter instead of peanut butter. This way, everyone can enjoy these tasty treats!
Storage Info
How to Store Butterfinger Balls
To keep your Butterfinger Balls fresh, use an airtight container. A simple plastic or glass container works well. Layer the balls with parchment paper to prevent sticking. Store them in the fridge. This keeps them firm and tasty.
Shelf Life
Your Butterfinger Balls will stay fresh for about one week in the fridge. If you want to keep them longer, freeze them. To freeze, place them in a single layer on a tray. Once frozen, transfer them to a freezer-safe bag. They can last up to three months when frozen. Just remember to thaw them in the fridge before serving. Enjoy these sweet bites whenever you crave a treat!
FAQs
Can I make Butterfinger Balls in advance?
Yes, you can make Butterfinger Balls ahead of time. For the best taste, prepare them a day in advance. This gives the flavors time to blend. After shaping the balls, chill them as instructed. Then, store them in an airtight container. Keep them in the fridge until you serve. They stay fresh for about a week. You can also freeze them for longer storage. Just remember to wrap them well.
What can I use instead of peanut butter?
If you need an alternative to peanut butter, try almond butter or cashew butter. Both have a similar texture and flavor. Sunflower seed butter is another great option for those with nut allergies. Each spread has its own taste, so choose one that suits your preference. These options will still give you a rich and creamy base for your Butterfinger Balls.
How can I make these without chocolate?
If you want to skip chocolate, you can use white chocolate instead. Just melt it like you would with milk chocolate. You can also coat the balls in yogurt instead. Greek yogurt gives a nice tangy flavor. For a simple finish, try rolling the balls in crushed nuts or sprinkles. This adds fun colors and textures without using chocolate.
In summary, we explored how to create delicious Butterfinger Balls. We covered the key ingredients, including creamy peanut butter and crushed Butterfinger bars, and went through the steps for mixing, shaping, and coating the treats. I shared tips for smooth chocolate and achieving the right texture. You can even find ways to customize these treats or store them well. Enjoy making these sweet snacks for gatherings or gifts. With a little effort, you’ll create something tasty that everyone will lov