Get ready to wow your friends and family with my Christmas Cheesecake Bars! These festive treats are not just creamy and sweet, but also packed with holiday spirit. With an easy-to-follow recipe, you can whip up a delicious dessert perfect for any gathering. I will guide you through each step, from mixing the crust to adding peppermint crunch. Dive into the joy of baking and spread the cheer with these flavorful bars!
Why I Love This Recipe
- Festive Flavor: The combination of cream cheese, peppermint, and crushed candy canes creates a delightful holiday flavor that’s perfect for Christmas celebrations.
- Easy to Make: This recipe is straightforward with simple steps, making it ideal for both novice and experienced bakers.
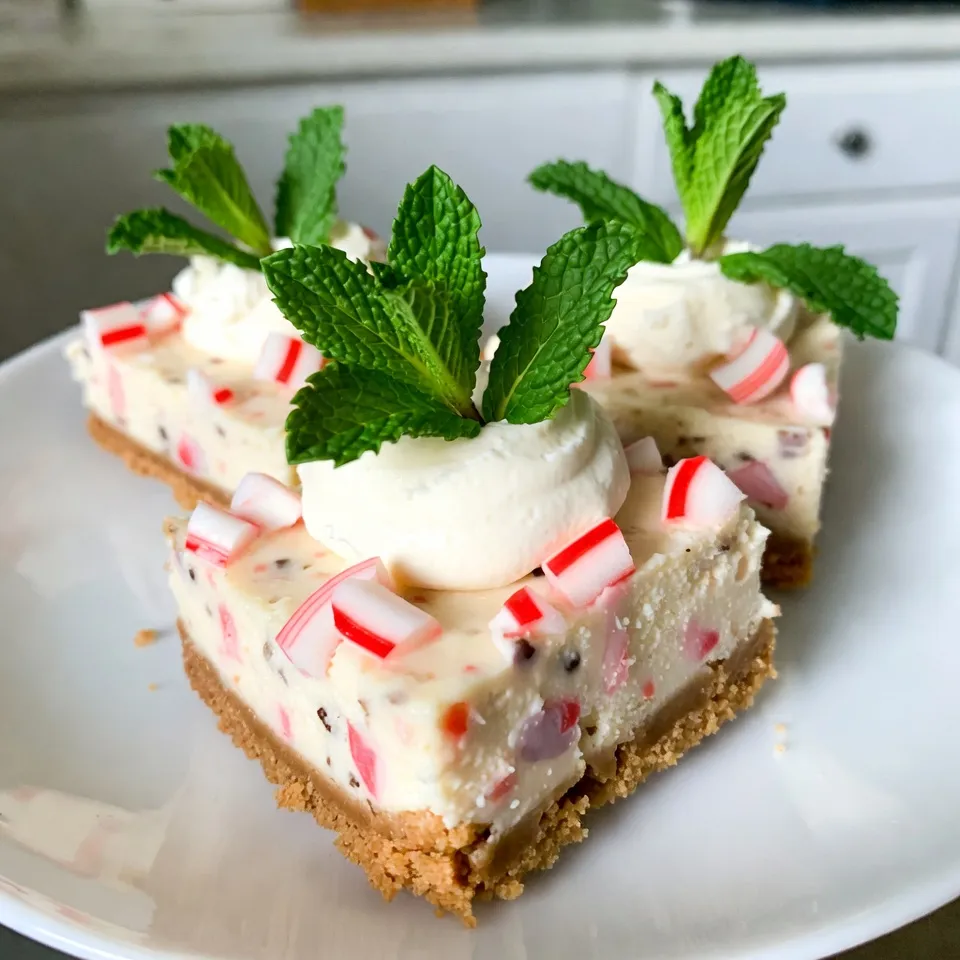
- Beautiful Presentation: With a creamy topping of whipped cream and festive garnishes, these cheesecake bars look as good as they taste, making them a stunning addition to any holiday gathering.
- Perfect for Sharing: Cut into squares, these bars are easy to serve and share, making them a great treat for parties and family gatherings.
Ingredients
Main Ingredients List
Cheesecake Filling Components
– 2 (8-ounce) packages cream cheese, softened
– ½ cup granulated sugar
– ¼ cup packed brown sugar
– 3 large eggs, at room temperature
– 1 teaspoon pure vanilla extract
– 1 teaspoon peppermint extract
– 1 teaspoon ground cinnamon
– 1 cup crushed candy canes
Crust Ingredients
– 1 ½ cups graham cracker crumbs
– ½ cup unsalted butter, melted
– 2 tablespoons granulated sugar
Garnishing Ingredients
– 1 cup whipped cream (for topping)
– Fresh mint leaves (for garnish)
– Additional crushed candy canes (for garnish)
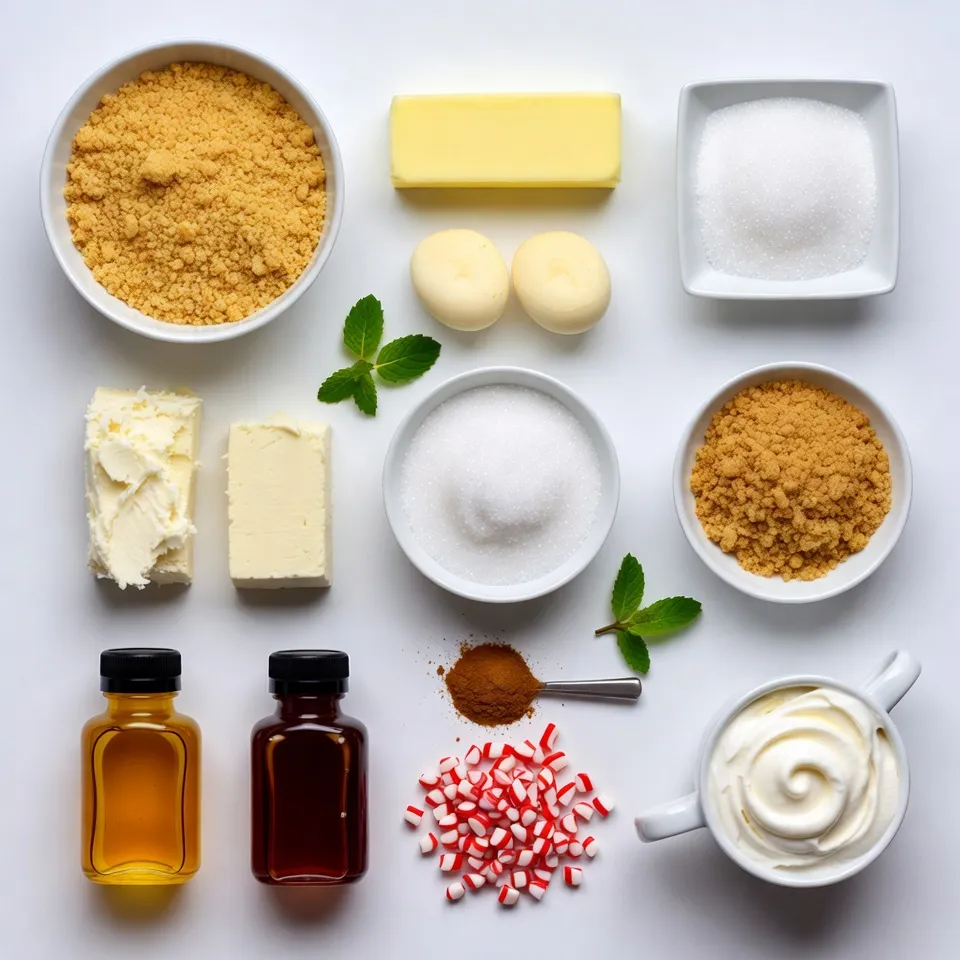
These ingredients come together to create a rich, creamy, and festive treat. The cream cheese gives the bars their smooth texture. The sugars sweeten the filling just right. Eggs help bind everything together. The extracts add a holiday twist, making these bars special. Candy canes bring a crunchy surprise in every bite.
For the crust, graham crackers provide a sweet and crunchy base. Melting the butter brings the crumbs together well, forming a solid layer. The sugar in the crust adds a touch of sweetness, balancing the filling.
Lastly, garnishing with whipped cream, mint leaves, and extra candy canes makes these bars look lovely. They not only taste great but also bring joy to your table.
Step-by-Step Instructions
Preparing the Crust
Mixing and Baking the Crust
Start by preheating your oven to 325°F (160°C). Take an 8×8 inch baking pan and line it with parchment paper. This helps you lift the bars out later. In a medium bowl, mix 1 ½ cups of graham cracker crumbs, ½ cup of melted unsalted butter, and 2 tablespoons of granulated sugar. Stir until it looks like wet sand. Firmly press this mixture into the pan’s bottom. Bake for 8-10 minutes until it turns lightly golden. Let it cool slightly.
Tips for Perfect Crust Texture
Make sure to press the crust down evenly. This helps it stay firm when baked. If it’s too crumbly, it won’t hold together. You can also try adding a pinch of salt for extra flavor.
Making the Cheesecake Filling
Mixing the Ingredients
In a large bowl, use an electric mixer to beat 2 packages of softened cream cheese. Mix until it’s smooth. Gradually add in ½ cup of granulated sugar and ¼ cup of brown sugar. Beat until blended. Then add 3 large eggs, one at a time. Mix on low speed after each egg. Next, add 1 teaspoon of vanilla extract, 1 teaspoon of peppermint extract, and 1 teaspoon of ground cinnamon. Mix until everything is combined.
Folding in Candy Canes
Gently fold in 1 cup of crushed candy canes. This adds a festive crunch and minty flavor. Make sure the candy canes are evenly distributed in the batter.
Baking and Cooling Process
Baking Time and Temperature
Pour the cheesecake filling over the crust. Smooth the top with a spatula. Bake for 30-35 minutes. The edges should be set, but the center can still jiggle a bit. Once baked, turn off the oven and crack the oven door. Let the bars cool for about an hour.
Cool Down Techniques
After an hour, move the bars to the fridge. Chill for at least 4 hours or overnight. This helps them firm up. When ready, lift the cheesecake bars from the pan using the parchment paper. Cut them into 16 squares. Top each one with whipped cream and extra crushed candy canes for a nice finish.
Tips & Tricks
Perfecting Your Cream Cheese Mixture
To make a smooth cream cheese mixture, start with softened cream cheese. This helps blend it well. Use an electric mixer for best results. Mix it until it’s creamy and free of lumps.
Room temperature is key. Cold cream cheese won’t mix well. Let it sit out for about an hour before using. This small step makes a big difference in texture.
Achieving the Best Texture
Be careful not to overmix your batter. Mix just until each egg is combined. Overmixing adds air, leading to cracks in your cheesecake bars.
Cooling is just as important as baking. After baking, leave the door slightly open. This helps the bars cool slowly. Chill them in the fridge for at least four hours. Overnight is even better for the best texture.
Presentation and Serving Ideas
For a festive touch, top each bar with whipped cream. Add a sprinkle of crushed candy canes for color and crunch. Fresh mint leaves also add a nice touch.
When serving, place the bars on a pretty platter. Use festive paper liners to make them pop. Dust the tops with powdered sugar for a snowy look. These simple ideas will impress your guests and make your dessert shine.
Pro Tips
- Chill Before Serving: For the best texture, make sure to chill the cheesecake bars for at least 4 hours, or overnight if possible, to allow them to firm up properly.
- Use Room Temperature Ingredients: Ensure that the cream cheese and eggs are at room temperature before mixing. This helps achieve a smoother batter and prevents lumps.
- Don’t Overmix: When adding the eggs, mix on low speed just until incorporated. Overmixing can introduce air bubbles, which may cause cracks in the cheesecake.
- Garnish Creatively: For a festive touch, consider adding edible glitter or chocolate shavings along with the crushed candy canes for an extra holiday sparkle.
Variations
Flavor Alternatives
You can change up the flavors of your cheesecake bars. Try using different extracts. Instead of peppermint, use vanilla or almond extract. Each will give a unique twist to your bars. If you want to add some fun, swap out the crushed candy canes. Use crushed chocolate bars, toffee bits, or even sprinkles. These changes can create a new flavor that fits your taste.
Dietary Modifications
Making your cheesecake bars fit different diets is easy! For a gluten-free option, use gluten-free graham cracker crumbs. They still give the same great crust. For a vegan version, swap the cream cheese for a plant-based alternative. You can also replace the eggs with a mixture of ground flaxseed and water. This keeps the bars creamy and delicious without the animal products.
Seasonal Additions
Holiday flavors can bring joy to your cheesecake bars. Consider adding spices like nutmeg or ginger for more warmth. You can also mix in some zest from oranges or lemons for a fresh taste. For the crust, try using crushed gingerbread cookies instead of graham crackers. This adds a festive crunch that pairs well with the creamy filling.
Storage Info
Refrigeration and Shelf Life
To store your Christmas cheesecake bars, place them in an airtight container. Make sure to keep them in the refrigerator. This way, they stay fresh and tasty. These bars can last for up to five days in the fridge.
For best practices, always cover the bars with plastic wrap or foil. This keeps them from drying out. If you plan to serve them later, chill them right after cutting. This helps maintain their texture and flavor.
Freezing Instructions
You can also freeze these cheesecake bars for longer storage. To freeze, first, cut them into squares. Then, wrap each piece tightly in plastic wrap. Place the wrapped bars in a freezer-safe bag. Press out as much air as possible before sealing.
To thaw, simply move the bars to the fridge overnight. This keeps the texture smooth and creamy. Avoid thawing at room temperature, as this can make them soggy. If you want to enjoy them warm, you can microwave them for a few seconds after thawing.
FAQs
How do I know when cheesecake bars are done baking?
You can tell cheesecake bars are done when the edges are set. The center should still jiggle a bit. This slight jiggle means they will firm up as they cool. If the edges look golden and the center is soft, it’s time to take them out.
Can I make these cheesecake bars ahead of time?
Yes, you can make these cheesecake bars a day or two before your event. Just bake and chill them as directed. They taste even better after sitting in the fridge. This allows the flavors to meld and deepen.
What can I substitute for graham cracker crumbs?
You can use crushed cookies like Oreos or vanilla wafers. Crushed pretzels work too for a salty kick. Just make sure to adjust the sugar if your substitute is sweet. This keeps the balance of flavors right.
How long do these bars last in the fridge?
These cheesecake bars can last up to five days in the fridge. Store them in an airtight container to keep them fresh. If they last that long, you can enjoy them for days!
You learned how to make delicious cheesecake bars. We covered the key ingredients, step-by-step prep, and baking tips. I shared ways to make them look great and taste even better. You can also try flavor swaps and dietary changes, depending on your needs. With proper storage, your cheesecake bars will stay fresh longer. Enjoy your baking journey and share these treats with friends and famil