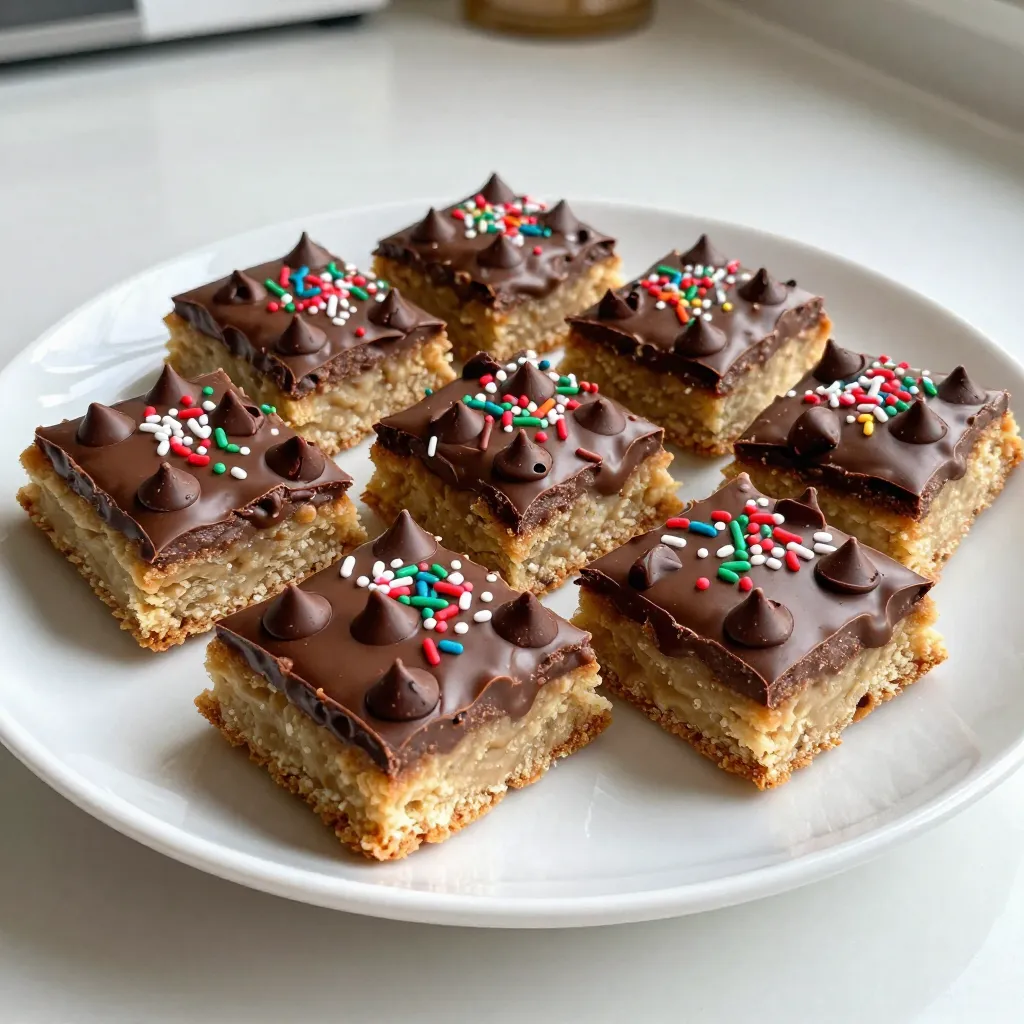
Get ready to whip up some festive magic with my simple Christmas Cookie Bars! These treats are easy to bake and perfect for sharing with family and friends. You can customize them to fit any taste, making them a hit at holiday gatherings. Follow my step-by-step guide to create a batch that will fill your home with warm, joyful scents this season. Let’s dive into the delicious world of Christmas Cookie Bars!
Why I Love This Recipe
- Festive Flavor: These cookie bars are bursting with festive flavors that perfectly capture the spirit of Christmas.
- Easy to Make: This recipe is straightforward and requires minimal time, making it perfect for busy holiday preparations.
- Shareable Treat: Cut into squares, these bars are easy to share with friends and family, making them great for gatherings.
- Customizable: You can easily customize these cookie bars by adding your favorite mix-ins or toppings!
Ingredients
Essential Ingredients for Christmas Cookie Bars
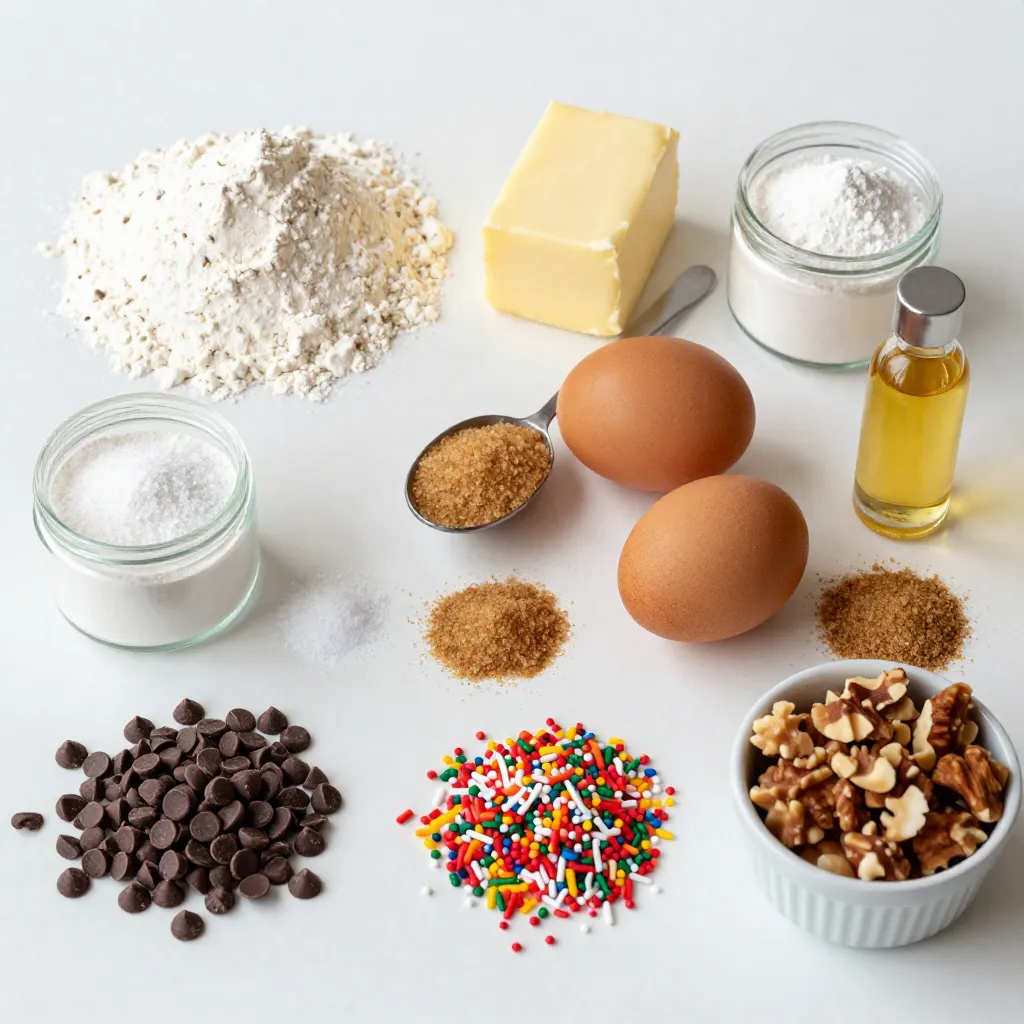
To make these yummy cookie bars, you need some basic ingredients. Here’s the list:
– 2 1/2 cups all-purpose flour
– 1 cup unsalted butter, softened to room temperature
– 1 cup granulated sugar
– 1/2 cup brown sugar, firmly packed
– 2 large eggs
– 1 teaspoon vanilla extract
– 1 teaspoon baking powder
– 1/2 teaspoon baking soda
– 1/2 teaspoon salt
– 1 teaspoon ground cinnamon
– 1 cup semi-sweet chocolate chips
– 1 cup holiday-themed sprinkles
These ingredients create a soft and chewy base. The butter gives the bars a rich flavor. The sugars add sweetness and help with texture. The eggs bind everything together, making the bars nice and tender.
Optional Add-ins
While the basic recipe is great, you can add extra fun! Here are some ideas:
– 1/2 cup chopped nuts (like walnuts or pecans)
Nuts add a nice crunch and flavor to your cookie bars. You can mix and match to find what you love best.
Tips for Selecting High-Quality Ingredients
Choosing good ingredients makes a big difference. Here are some tips:
– Butter: Use unsalted butter for better control of salt. Look for high-fat butter for a creamier taste.
– Flour: Choose all-purpose flour that is fresh. It should feel soft and light.
– Sugars: Granulated and brown sugars should be free of lumps. This helps in blending.
– Chocolate Chips: Use semi-sweet chocolate chips for a classic taste. Check that they are fresh for the best melt.
– Sprinkles: Pick colorful sprinkles that match your theme. They add joy and color to the bars.
Using high-quality ingredients leads to better flavor and texture in your cookie bars.
Step-by-Step Instructions
Prepping the Baking Pan
Start by preheating your oven to 350°F (175°C). Grab a 9×13 inch baking pan. Line it with parchment paper. Make sure some paper hangs over the sides. This will help you lift the cookie bars out later.
Creaming the Butter and Sugars
In a large mixing bowl, place your softened butter. Add the granulated sugar and brown sugar. Use an electric mixer to blend them together. Mix for about 2-3 minutes. You want the mix to look light and fluffy.
Mixing the Dry Ingredients
In another bowl, combine the all-purpose flour, baking powder, baking soda, salt, and ground cinnamon. Use a whisk to blend them well. This step ensures your cookie bars will rise nicely.
Combining Wet and Dry Mixtures
Now, take your wet mixture with butter and sugars. Crack in the eggs one by one, mixing after each. Add the vanilla extract and mix until smooth. Gradually add the dry mix to the wet mix. Stir gently with a spatula until just combined. Be careful not to overmix; this keeps your bars tender.
Baking and Cooling Process
Fold in the chocolate chips and holiday-themed sprinkles. If you like nuts, add those too. Spread the batter evenly in the baking pan with a spatula. Bake for 25-30 minutes. The edges should turn golden brown. Stick a toothpick in the center; it should come out clean. Let the bars cool for 10 minutes in the pan. Then lift them out using the parchment paper. Place them on a wire rack to cool completely before cutting into squares.
Tips & Tricks
How to Achieve the Perfect Texture
To get soft and chewy cookie bars, focus on mixing. Cream the butter and sugars until fluffy. This step adds air, making the bars light. When mixing dry ingredients, be gentle. Overmixing can create tough bars. Fold in chocolate chips and sprinkles carefully. This keeps the texture tender. Bake until the edges turn golden brown. A toothpick should come out clean from the center.
Decorating Ideas for Festive Presentation
For a festive touch, arrange your cookie bars on a colorful platter. Use holiday-themed sprinkles on top for extra cheer. Drizzle some melted chocolate over the bars for a fun look. You can also place a few nuts on top for crunch. Add some fresh mint leaves for a pop of color. These small details make your bars stand out at parties.
Common Mistakes to Avoid
One mistake is using cold butter. Always use softened butter for the best texture. Another is not lining the baking pan properly. This can make it hard to remove the bars later. Avoid opening the oven door too soon. This can cause the bars to sink. Lastly, don’t skip cooling time. Letting them cool helps the bars set correctly.
Pro Tips
- Chill the Dough: If you have time, chill the cookie dough for about 30 minutes before baking. This helps the flavors to meld and can result in a thicker, chewier bar.
- Use Quality Chocolate: Using high-quality semi-sweet chocolate chips can elevate the flavor of your cookie bars significantly. Look for brands with higher cocoa content for a richer taste.
- Check for Doneness: To ensure your cookie bars are perfectly baked, start checking for doneness a few minutes before the suggested baking time. They should be golden brown at the edges and slightly soft in the center.
- Customize the Toppings: Feel free to get creative with your toppings! Substitute holiday-themed sprinkles with crushed candy canes or colored chocolate for a festive twist.
Variations
Different Flavor Combinations
You can change the flavors to fit your taste. Try swapping the semi-sweet chocolate chips for other types. Dark chocolate chips add a rich taste. White chocolate brings a sweet twist. You might also like adding peanut butter chips for a nutty flavor. If you want a fruity touch, mix in dried cranberries or cherries. Each option will make your cookie bars unique!
Gluten-Free Options
If you want gluten-free bars, you can use gluten-free flour. Look for a blend that works well in baking. Replace the all-purpose flour with 2 1/2 cups of gluten-free flour. This swap keeps the taste and texture great. Always check that your baking powder is gluten-free too. Your gluten-free bars will still be festive and fun!
Holiday-Themed Modifications
Make your cookie bars even more festive with fun toppings. Use different holiday-themed sprinkles for a bright look. You can choose red and green sprinkles for Christmas cheer. If you love chocolate, drizzle melted white or dark chocolate on top. You could even add crushed candy canes for a minty flavor. These small changes make your cookie bars perfect for any holiday party!
Storage Info
Best Practices for Storing Cookie Bars
To keep your Christmas cookie bars fresh, store them in an airtight container. Place a piece of parchment paper between layers to prevent sticking. You can also wrap them tightly in plastic wrap for extra protection. Keep the container in a cool, dry place away from sunlight. This helps maintain their texture and flavor.
Freezing and Thawing Instructions
You can freeze cookie bars for long-term storage. First, let them cool completely. Then, cut them into squares and wrap each piece in plastic wrap. Place the wrapped squares in a freezer-safe bag. Make sure to remove as much air as possible. When you want to enjoy them, take out a square and let it thaw at room temperature. You can also warm them in the microwave for a few seconds.
How Long Do They Last?
Stored properly, your cookie bars will last up to a week at room temperature. If you freeze them, they can stay fresh for up to three months. Just remember to label your container or bag with the date. This way, you can keep track of how long they’ve been stored. Enjoy your festive treat any time!
FAQs
Can I make Christmas Cookie Bars in advance?
Yes, you can make these cookie bars in advance. I often bake them a day or two before my holiday events. After they cool, cut them into squares and store them in an airtight container. They stay fresh for several days. If you want to keep them longer, freeze the bars. Wrap them tightly in plastic wrap, then put them in a freezer bag.
How do I know when the cookie bars are done baking?
You can tell the cookie bars are done when the edges turn a nice golden brown. Another way is to insert a toothpick into the center. If it comes out clean or with a few crumbs, they are ready. Avoid overbaking to keep them soft and chewy.
What can I substitute for eggs in this recipe?
If you need to replace eggs, you have options. You can use applesauce, mashed bananas, or yogurt. Each option works well. For one egg, use 1/4 cup of applesauce or mashed banana. If you use yogurt, 1/4 cup works too. These swaps help keep your bars moist.
Can I use different types of chocolate chips?
Absolutely! You can mix and match chocolate chips. Dark chocolate, milk chocolate, or even white chocolate can work. You can also use butterscotch or peanut butter chips for a fun twist. Get creative and find your favorite combination!
You learned about the key ingredients for Christmas cookie bars. This includes both essentials and fun add-ins. I guided you through easy steps for baking these treats. I also shared tips for perfect texture and festive decorating. Lastly, we discussed storage tips to keep your bars fresh.
Now you’re ready to make delicious cookie bars for the holiday season! Enjoy your baking and share these joyful treats with friends and famil