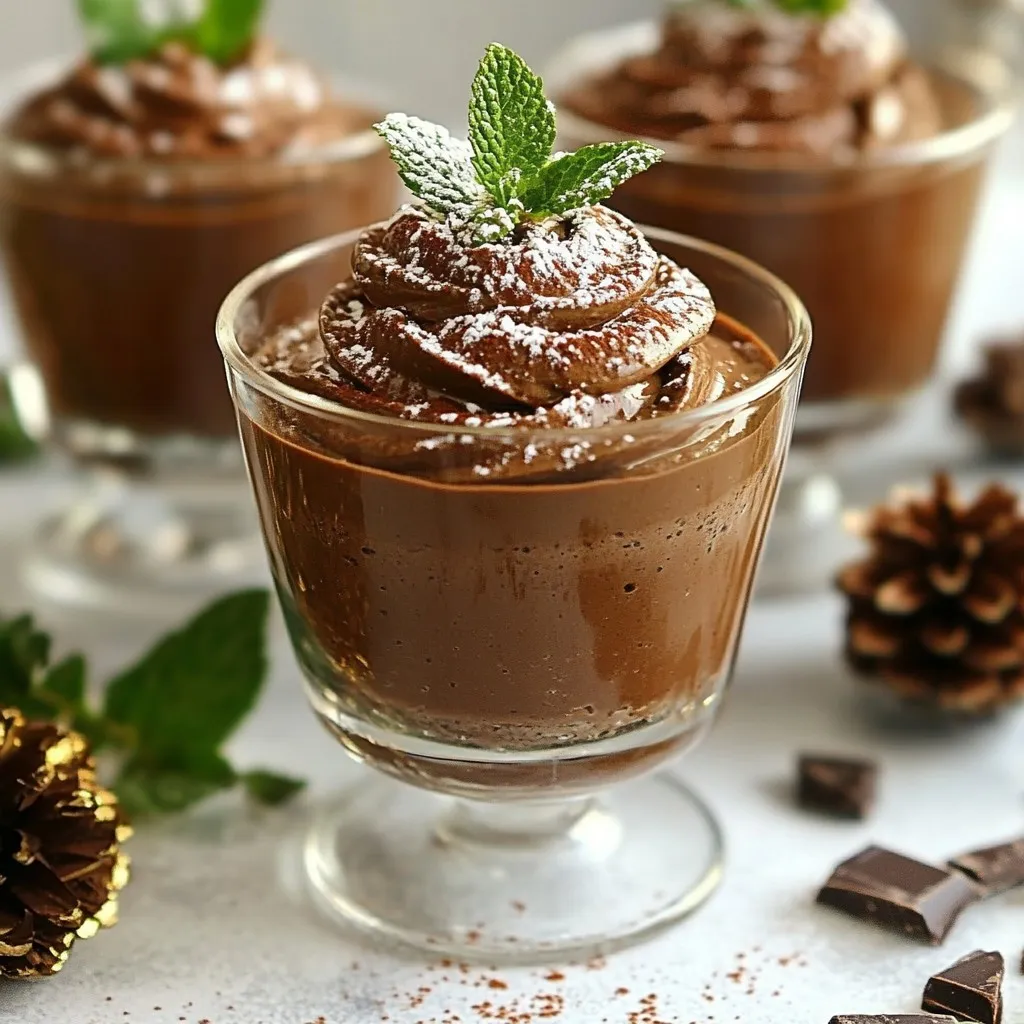
Get ready to impress your guests this holiday season with my Decadent Christmas Chocolate Mousse Cups! These rich, creamy delights will make any festive table shine. With simple ingredients like dark chocolate, eggs, and cream, you can create a dessert that looks stunning and tastes heavenly. Whether you’re a novice or a pro in the kitchen, my step-by-step guide will make this treat a holiday favorite. Let’s dive into the magic of mousse!
Why I Love This Recipe
- Indulgent Flavor: This chocolate mousse is rich and decadent, providing a luxurious treat that feels special for the holiday season.
- Simple Preparation: Despite its elegance, this mousse is surprisingly easy to make, requiring just a few simple ingredients and steps.
- Beautiful Presentation: The mousse cups look stunning when served, making them a perfect dessert for impressing guests at festive gatherings.
- Versatile Garnishes: You can customize the mousse with a variety of garnishes, from chocolate shavings to fresh mint, allowing for creativity in presentation.
Ingredients
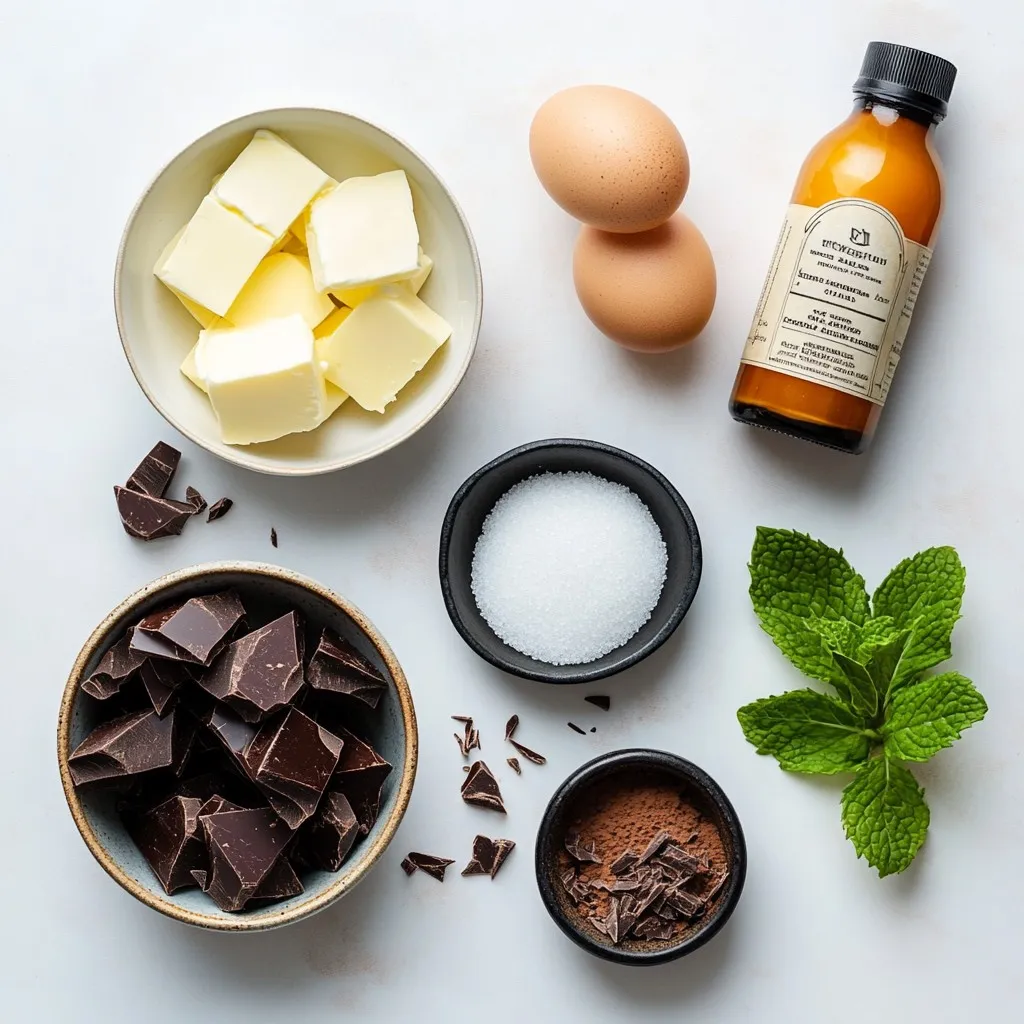
Main Ingredients
– 200g dark chocolate (70% cocoa), finely chopped
– 3 tablespoons unsalted butter, plus a little extra for greasing
– 2 large eggs, separated (whites and yolks in separate bowls)
– 2 tablespoons granulated sugar
– 1 teaspoon pure vanilla extract
– 1 cup heavy whipping cream, chilled
– Pinch of salt
Optional Garnishes
– Grated chocolate
– Cocoa powder
– Fresh mint leaves
These ingredients form the base of your decadent Christmas chocolate mousse cups. Dark chocolate gives the mousse a rich taste. Unsalted butter adds a smooth texture. The eggs provide structure, while sugar sweetens the mix. Heavy whipping cream makes it light and fluffy. A splash of vanilla enhances the flavor, and salt brings balance.
For garnishing, you can use grated chocolate for elegance, cocoa powder for a bold touch, or fresh mint leaves for a pop of color. Each option adds a festive flair to your dessert. Enjoy mixing these simple yet high-quality ingredients to create a treat that feels special and tastes divine!
Step-by-Step Instructions
Melting the Chocolate
To start, take 200g of dark chocolate and 3 tablespoons of unsalted butter. Place them in a heatproof bowl. Set this bowl over a pot of gently simmering water. This is your double boiler method. Stir the mixture often. You want the chocolate and butter to melt until smooth. Once melted, remove it from the heat. Let it cool for about 10 minutes until it feels warm to the touch.
Preparing the Egg Mixture
Next, grab two large eggs. You will need to separate the yolks from the whites. In a clean bowl, whisk the egg yolks with 2 tablespoons of granulated sugar and 1 teaspoon of vanilla extract. Keep whisking until the mix becomes pale and creamy. Slowly add the melted chocolate mixture to the egg yolks. Stir until it is smooth and well combined.
Whipping the Cream and Egg Whites
Now, let’s whip the cream. Pour 1 cup of chilled heavy whipping cream into a large bowl. Use a hand mixer or a whisk to whip the cream until soft peaks form. This should not take long. Be careful not to overwhip; the cream should stay soft. In another bowl, whisk the egg whites with a pinch of salt. You want to whip them until they form stiff peaks. This means the peaks should stand tall when you lift the mixer out.
Folding Techniques
Here comes the fun part! First, gently fold the whipped cream into the chocolate mixture. Do this in 2 to 3 parts. Use a spatula and fold carefully. You want to keep it light and airy. Next, fold in the whipped egg whites. Again, do this gently in two additions. Bring the mixture from the bottom up over the top. This keeps the mousse fluffy.
Chilling the Dessert
Transfer the rich chocolate mousse into small serving cups. You can use a spoon or a pastry bag for a fancy touch. Cover the cups with plastic wrap. Then, place them in the fridge. Chill for at least 2 hours. This helps the mousse set and become firm.
Tips & Tricks
Presentation Tips
– Serve the mousse in clear cups. This lets the rich layers show.
– Use a decorative tray for an elegant display.
– Add a small sprig of mint beside each cup for a fresh touch.
– Sprinkle grated chocolate or cocoa powder on top for extra flair.
Common Mistakes to Avoid
– Do not overwhip the cream. This can make it too thick and heavy.
– Be gentle when folding ingredients. You want to keep the mousse light.
– Avoid deflating the mixture while combining. Fold carefully and slowly.
Serving Suggestions
– Pair the mousse with a cup of coffee or a glass of dessert wine.
– Offer light cookies or fruit on the side for contrast.
– Try serving with a scoop of vanilla ice cream for extra richness.
Pro Tips
- Use High-Quality Chocolate: The flavor of your mousse is heavily reliant on the chocolate you choose. Opt for a high-quality dark chocolate with at least 70% cocoa for a rich and indulgent taste.
- Room Temperature Ingredients: Ensure your eggs, butter, and cream are at room temperature. This helps in better emulsification and results in a smoother mousse.
- Don’t Overmix: When folding in the whipped cream and egg whites, be gentle. Overmixing can deflate the airy texture of the mousse, resulting in a denser dessert.
- Chill for Best Results: Allowing the mousse to chill for at least 2 hours is crucial. This not only helps it set properly but also enhances the flavors as they meld together.
Variations
Flavor Infusions
You can make this chocolate mousse even more exciting. Adding liqueurs like coffee or peppermint gives it a unique twist. A little splash can enhance the flavor. If you prefer a different taste, try using milk chocolate or white chocolate. These options create a sweeter mousse that many love.
Dietary Adjustments
If you need gluten-free options, this recipe is already safe! The ingredients do not include any flour. For vegan adaptations, replace eggs with aquafaba. Whip the aquafaba until it forms stiff peaks. Use vegan dark chocolate instead of regular chocolate. This allows everyone to enjoy a tasty treat.
Serving Styles
You can serve the mousse in many fun ways. Layered parfaits look beautiful in clear cups. Just alternate layers of mousse with whipped cream. For a more casual style, serve individual cups. Share them with friends for a cozy gathering. Each cup adds a touch of charm to your table.
Storage Info
Best Practices for Refrigeration
How long does the mousse last?
The mousse cups can last up to four days in the fridge. After that, they may lose their creamy texture.
What are proper sealing techniques?
To keep the mousse fresh, cover each cup with plastic wrap. Make sure it touches the mousse to reduce air exposure. This helps prevent the mousse from absorbing any odors in the fridge.
Freezing Mousse Cups
What are the guidelines for freezing?
You can freeze mousse cups for up to a month. First, let them chill in the fridge for two hours. Then, cover each cup tightly with plastic wrap and aluminum foil.
What are the thawing instructions?
To thaw, place the mousse cups in the fridge overnight. Avoid thawing at room temperature. This keeps the texture smooth and creamy, making every bite a delight.
FAQs
Can I use white chocolate?
Yes, you can use white chocolate! It will change the flavor and texture. White chocolate is sweeter and creamier. You still need butter to help it melt. Adjust the sugar in your recipe since white chocolate is sweet. This swap gives a unique twist to your mousse cups.
How can I make it ahead of time?
You can make these mousse cups a day in advance. Just prepare them as usual and let them chill. Cover each cup with plastic wrap before refrigerating. When ready to serve, add your garnishes. This saves time on busy days and keeps the dessert fresh.
Is this recipe suitable for kids?
This recipe contains raw eggs. Raw eggs can pose a risk for young kids. If you want to make it kid-friendly, use pasteurized eggs. These eggs are safe to eat raw. Always check for allergies before serving.
What should I do if my mousse doesn’t set?
If your mousse doesn’t set, it might be due to factors like overwhipping. Ensure you whip the cream and egg whites correctly. If it still doesn’t set, try chilling it longer. Sometimes, mousse needs more time to firm up. If all else fails, blend in more melted chocolate for thickness.
This blog post covered making a delicious chocolate mousse. We looked at key ingredients like dark chocolate, eggs, and cream. I shared step-by-step instructions, important tips, and creative variations. Good presentation makes a big difference too. Remember to store your mousse properly to keep it fresh. With the right techniques and care, you can create a stunning dessert. Enjoy impressing friends and family with your skill