Looking for the easiest sugar cookie icing? You’ve come to the right place! This simple and quick recipe will transform your cookies into sweet works of art. With just a few ingredients and step-by-step instructions, you’ll create a delicious icing that stuns and delights without stress. I’ll also share handy tips, tricks, and variations to make your cookies shine for any occasion. Ready to sweeten your baking game? Let’s dive in!
Why I Love This Recipe
- Quick and Easy: This icing comes together in just 10 minutes, making it a perfect last-minute addition to your baking projects.
- Customizable Colors: With food coloring, you can easily create vibrant shades that match any occasion or theme.
- Perfect Consistency: The icing achieves a smooth, pourable consistency that makes decorating a breeze.
- Delicious Flavor: The addition of vanilla extract enhances the flavor, making these cookies even more delightful.
Ingredients
List of Ingredients
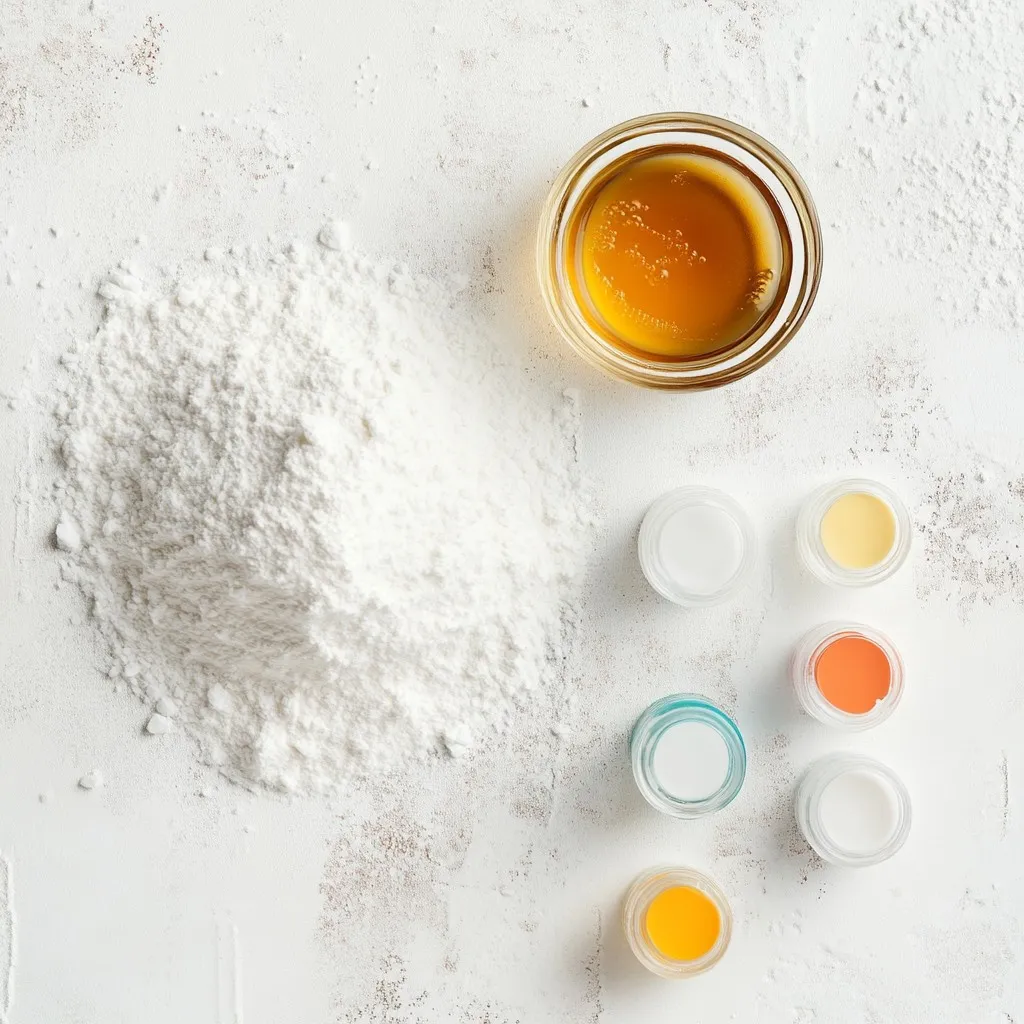
To make the easiest sugar cookie icing, you need:
– 2 cups powdered sugar
– 2 tablespoons milk (or water)
– 1 teaspoon vanilla extract
– A pinch of salt
– Food coloring (optional)
How to Measure Ingredients
Measuring ingredients correctly is key. Use a dry measuring cup for the powdered sugar. Scoop the sugar into the cup, then level it off with a straight edge. Avoid packing it down. For liquids like milk, use a liquid measuring cup. Pour until it reaches the desired mark. Measuring accurately ensures your icing turns out great.
Substitute Options
If you run out of any ingredient, don’t worry! You can make simple swaps. Instead of milk, use water or a dairy-free milk. For vanilla extract, try almond extract for a different flavor. You can leave out the salt if you want. If you want a thicker icing, add more powdered sugar. Play around with these options and find what you like best!
Step-by-Step Instructions
Mixing the Icing
To start, gather a medium mixing bowl. Pour in 2 cups of powdered sugar. Add 2 tablespoons of milk or water slowly. Use a whisk to mix it well. You want a smooth and creamy texture. Keep whisking until there are no lumps. This step is key for nice icing.
Next, add 1 teaspoon of vanilla extract and a pinch of salt. Whisk again until it is all mixed. If your icing seems too thick, add a tiny bit more milk. The goal is to have icing thick enough to coat a spoon but still fluid for drizzling.
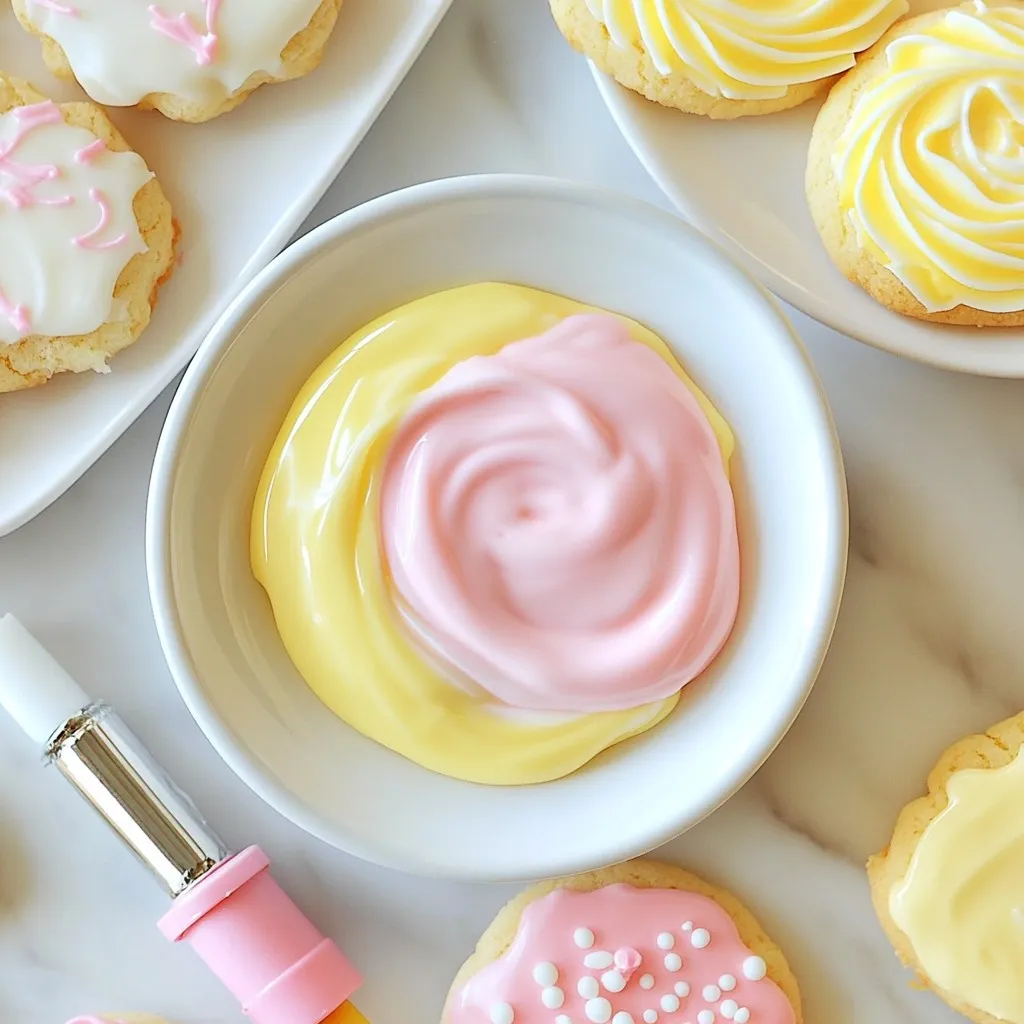
Adding Color
If you want to make your icing colorful, divide it into separate bowls. Choose your food coloring. You can use gel or liquid types. Add a few drops of color to each bowl. Mix until you get the shades you like. Remember, you can always add more color, but it’s hard to take it away!
Application Techniques
For applying the icing, you have a couple of options. One way is to use a piping bag. This gives you more control for detailed designs. Just fill the bag with icing and squeeze gently.
If you prefer a simpler method, use a small spoon for drizzling. Just let the icing fall over the cookies. It’s easy and still looks great! Once you finish decorating, leave the cookies out for about 30 minutes. This helps the icing harden before serving.
Tips & Tricks
Troubleshooting Common Issues
Fixing Thick Icing
If your icing is too thick, don’t worry! Just add a tiny bit more milk. Start with just half a teaspoon. Mix well and check the texture. You want it to coat the back of a spoon. If it’s still thick, add a little more milk until it flows easily.
Dealing with Lumpy Mixture
Sometimes, you may find lumps in your icing. This can happen if the powdered sugar clumps. To fix this, whisk the icing more vigorously. If lumps persist, strain the icing through a fine mesh sieve. This will give you a smooth finish.
Presentation Ideas
Arranging Cookies for Serving
Once your cookies are iced, it’s time to show them off! Use a nice platter to arrange your cookies. Place them in a circle or in rows. You can even mix in some plain cookies for contrast. This adds visual interest and makes the display pop.
Adding Decorative Touches
Want to make your cookies shine? Sprinkle some edible glitter on top of the icing. You can also use tiny candies or sprinkles. These little touches make your cookies look extra special. They also add a fun, festive vibe to your treats.
Pro Tips
- Adjusting Consistency: If your icing is too thick, add milk a teaspoon at a time until you reach the desired drizzling consistency.
- Color Mixing: For vibrant colors, use gel food coloring instead of liquid as it provides more intense hues without altering the icing’s consistency.
- Storage Tips: If not using immediately, cover the icing with plastic wrap directly on the surface to prevent it from drying out.
- Quick Hardening: To speed up the hardening process of the icing, place the decorated cookies in the fridge for 10-15 minutes.
Variations
Flavor Variations
You can change the flavor of your sugar cookie icing easily. Instead of vanilla extract, try almond or lemon extract. Almond will give a nutty taste, while lemon adds a fresh zing. Both make your icing special and tasty.
Experimenting with other extracts can be fun. Use coconut extract for a tropical twist. Peppermint extract works well for winter cookies. Just remember to use less, as some extracts are stronger. Start with half the amount and taste as you go.
Seasonal Themes
Holiday themes can make your cookies stand out. For Halloween, use orange and black colors. Add spooky designs like ghosts or pumpkins. For Christmas, think red and green. Snowflakes and Christmas trees look great on iced cookies.
Color schemes can fit any occasion. For birthdays, use bright colors like pink and blue. Pastel shades work well for spring holidays. Choose your colors based on the theme you want. This will make your cookies festive and fun.
Storage Info
How to Store Icing
To keep your icing fresh, store it in airtight containers. This prevents air from drying it out. If you have leftover icing, simply cover it tightly. You can use plastic wrap or a lid.
Now, what about refrigeration? You can refrigerate icing, but it may thicken. If it gets too thick, add a drop of milk or water. Stir well before using it again.
Storing Iced Cookies
When storing your iced cookies, place them in a single layer. This keeps the icing intact. If you need to stack them, use parchment paper between layers.
What is the shelf life of decorated cookies? Iced cookies last about a week at room temperature. They stay fresh longer if you seal them well. However, if you add perishable ingredients, like cream cheese, store them in the fridge.
FAQs
How long does sugar cookie icing take to dry?
Sugar cookie icing can take about 30 minutes to dry. But, drying time can change based on a few factors.
– Humidity: High humidity slows down the drying process. In dry air, it dries faster.
– Icing Thickness: Thicker icing takes longer to set. Aim for a medium thickness for faster drying.
– Temperature: Warmer rooms help icing dry quicker. Cold rooms can delay the process.
Can I freeze cookies with icing?
Yes, you can freeze cookies with icing on them. Here are some tips for freezing decorated cookies:
– Cool Completely: Make sure cookies are dry before freezing. This keeps the icing intact.
– Use Wax Paper: Place wax paper between layers of cookies. This prevents sticking.
– Airtight Containers: Store cookies in airtight containers. This helps keep them fresh.
– Thawing: Let cookies thaw at room temperature. Don’t rush this step to avoid sogginess.
How to fix icing that is too runny?
If your icing is too runny, don’t worry! Here are some quick fixes:
– Add Powdered Sugar: Gradually add more powdered sugar. This thickens the icing without changing the flavor.
– Chill the Icing: Place the icing in the fridge for a few minutes. This can help it firm up.
– Check Consistency: Aim for a consistency that coats the back of a spoon. Adjust as needed until it feels just right.
We covered how to make icing and decorate cookies. First, I shared how to measure ingredients and what substitutes work best. Then, I gave clear steps for mixing and coloring icing. I included tips for applying icing and fixing common problems. I also mentioned fun ways to add flavor and decorate for seasons. Lastly, I talked about storage for icing and cookies.
With these tips, you can create beautiful, tasty treats. Enjoy your bakin