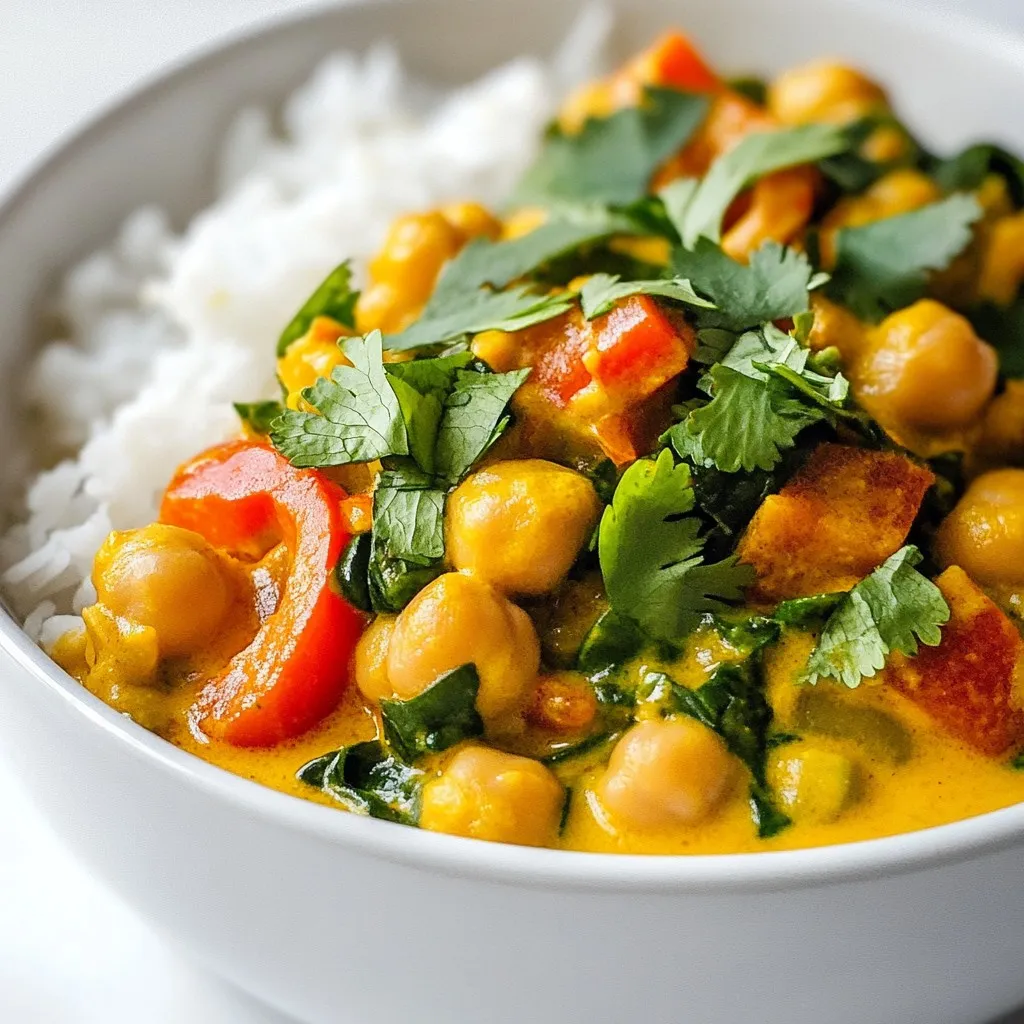
Craving a quick and tasty meal? You’ll love this Easy Chickpea Coconut Curry! This dish packs a punch with flavor while being simple to make. Plus, it’s great for busy days when time is tight. In this post, I’ll guide you through the must-have ingredients, step-by-step cooking instructions, and handy tips to make it perfect every time. Let’s dive into the world of delicious curry and satisfy your taste buds!
Why I Love This Recipe
- Quick and Easy: This recipe comes together in just 30 minutes, making it perfect for busy weeknights.
- Flavorful and Nutritious: The combination of spices and coconut milk creates a rich, creamy curry that is both satisfying and healthy.
- Versatile Ingredients: You can easily customize this curry with your favorite vegetables or proteins, making it adaptable to your taste.
- Plant-Based Delight: This dish is entirely vegan, packed with protein from chickpeas, and is sure to please everyone at the table.
Ingredients
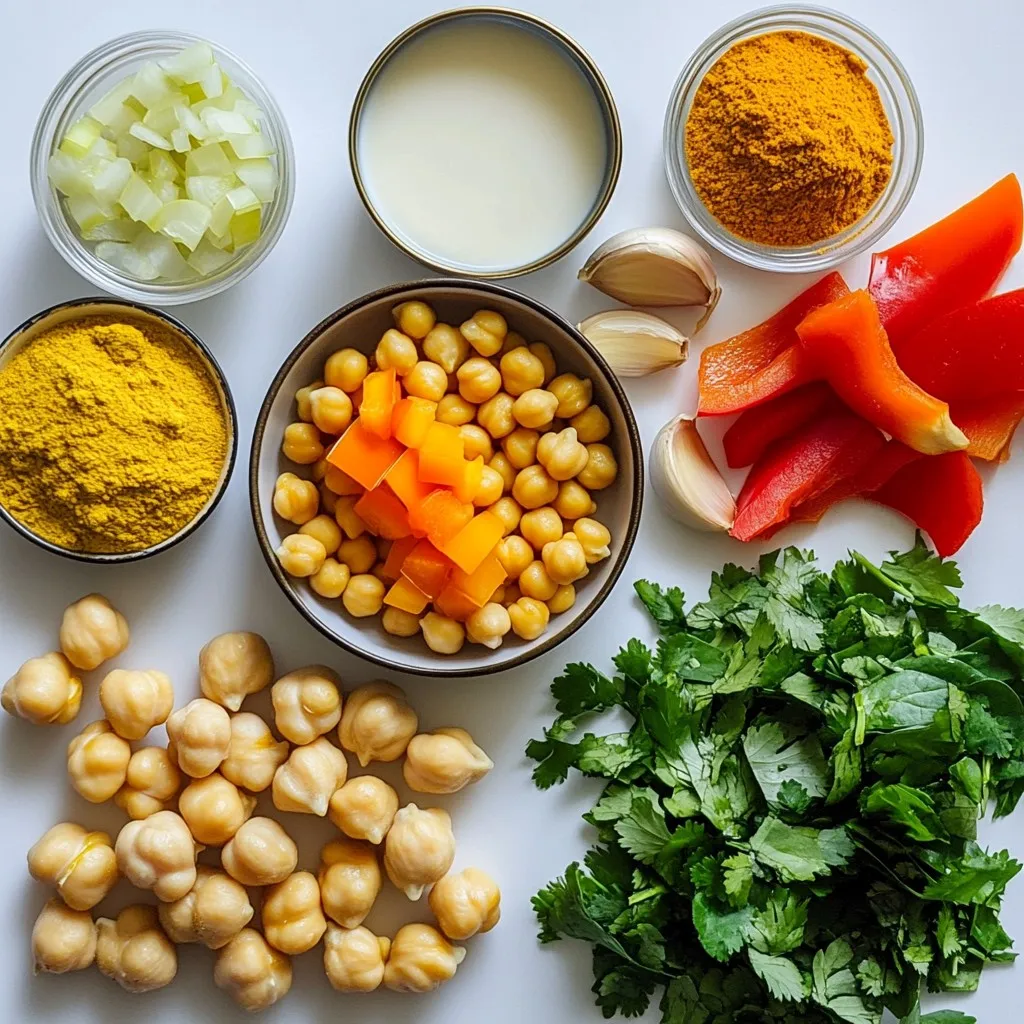
List of Required Ingredients
To make this easy chickpea coconut curry, you will need:
– 2 cans chickpeas, thoroughly drained and rinsed
– 1 can (13.5 oz) full-fat coconut milk
– 1 tablespoon coconut oil
– 1 medium onion, finely diced
– 2 cloves garlic, finely minced
– 1 tablespoon fresh ginger, finely grated
– 1 tablespoon curry powder
– 1 teaspoon ground turmeric
– 1 teaspoon ground cumin
– 1 bell pepper of your choice, chopped into bite-sized pieces
– 2 cups fresh baby spinach, washed and dried
– Salt and freshly cracked black pepper to taste
– Fresh cilantro leaves for garnish
– Cooked rice or quinoa for serving
Ingredient Substitutions
If you don’t have some ingredients, don’t worry! You can swap them out easily.
– Instead of chickpeas, you can use lentils or white beans.
– Coconut milk can be replaced with almond milk, but it will change the flavor.
– Use olive oil if you don’t have coconut oil.
– Any onion works, but red or yellow onions add a nice sweetness.
– You can add green beans or zucchini instead of bell pepper.
– If you don’t have fresh ginger, use half the amount of ground ginger.
Fresh vs. Canned Ingredients
Using fresh ingredients can make your curry more vibrant and tasty. Fresh garlic and ginger have strong flavors. However, canned ingredients are quick and easy. Canned chickpeas save time and are just as nutritious. Always rinse canned beans well to remove sodium. If you can, choose fresh spinach. It wilts down nicely in the curry. Fresh produce gives your dish a bright look and taste!
Step-by-Step Instructions
Preparation Overview
First, gather all your ingredients. This dish comes together fast, so having everything ready is key. You will need chickpeas, coconut milk, onion, garlic, ginger, spices, bell pepper, spinach, and rice or quinoa for serving.
Detailed Cooking Directions
1. Heat coconut oil in a large pot on medium heat until it melts.
2. Add the diced onion and sauté for about 5 minutes. The onion should be soft and clear.
3. Stir in minced garlic and grated ginger. Cook for one more minute until you smell their lovely scent.
4. Add curry powder, turmeric, and cumin. Stir well to cover the onions with spices.
5. Mix in the chopped bell pepper and cook for 3-4 minutes. The bell pepper should be tender.
6. Pour in the coconut milk while stirring. Bring the mix to a gentle simmer.
7. Add the rinsed chickpeas and stir. Let the curry simmer for 10 minutes to blend flavors.
8. Just before serving, add the baby spinach. Cook for 2-3 minutes until the spinach is bright green.
9. Taste and season with salt and black pepper as you like. Adjust the spices to your taste.
10. Serve the warm curry over rice or quinoa. Garnish with fresh cilantro for color and taste.
Tips for Cooking Spices
– Always toast spices in oil for better flavor. This helps release their oils and enhances taste.
– Keep an eye on the heat. Too high can burn spices, making them bitter.
– Use fresh spices for the best flavor. If your spices are old, they may not add much.
– Don’t be afraid to experiment with different spice amounts. Find the balance that suits your taste!
Tips & Tricks
How to Thicken Curry
To thicken your curry, add a bit of cornstarch mixed with water. Start with one tablespoon of cornstarch and two tablespoons of cold water. Mix until smooth, then stir it into the curry. Cook for a few minutes to see the change. You can also use coconut milk. A thicker coconut milk gives a richer texture. Another option is to simmer the curry longer. This will allow some liquid to evaporate, making it thicker.
Adjusting Spice Levels
If you want more heat, add a pinch of cayenne pepper. Start small and taste often. If the dish is too spicy, balance it with a touch of sugar or more coconut milk. For milder flavors, reduce or skip the curry powder. You can also add plain yogurt when serving. This will cool down the heat while adding creaminess.
Best Sides to Serve with Curry
This chickpea coconut curry pairs well with several sides. Here are some favorites:
– Rice: White or brown rice works nicely.
– Quinoa: A great gluten-free option.
– Naan Bread: Perfect for scooping up the curry.
– Salad: A fresh cucumber or green salad adds crunch.
– Raita: A yogurt-based dip cools the spice and adds flavor.
Feel free to mix and match sides to fit your taste!
Pro Tips
- Balance Your Flavors: Always taste your curry before serving and adjust seasoning as needed. A dash of lime juice or a pinch of sugar can enhance the overall flavor profile.
- Customize Your Veggies: Feel free to add other vegetables like zucchini, carrots, or peas for added nutrition and texture. Just adjust cooking times accordingly.
- Meal Prep Friendly: This curry can be made in larger batches and stored in the fridge for up to 4 days or frozen for longer storage, making it perfect for meal prep.
- Garnishing for Flair: Top your curry with toasted coconut flakes or chopped nuts for an extra crunch and a beautiful presentation.
Variations
Vegan and Vegetarian Options
This chickpea coconut curry is already vegan and vegetarian-friendly. You can enjoy it as is. If you want to make it richer, try adding more coconut milk. You can also add nuts for extra crunch. Cashews or almonds work well. They add a nice texture and taste.
Adding Different Vegetables
Feel free to get creative with vegetables. You can use broccoli, carrots, or zucchini. Just chop them into small pieces. Add them when you stir in the bell pepper. This way, they cook just right. You can also use frozen vegetables if you’re short on time. They are quick and easy to add.
Protein Additions (e.g., Tofu or Chicken)
Want to add more protein? Tofu is a great choice. Cut it into cubes and fry it before adding it to the curry. For chicken lovers, you can use diced chicken breast. Cook it first in the pot until it’s no longer pink. Then, add the spices and follow the rest of the recipe. Both options make the dish heartier. Enjoy making it your own!
Storage Info
How to Store Leftovers
To store leftover chickpea coconut curry, let it cool first. Use an airtight container to keep it fresh. Place the curry in the container and seal it tightly. Store it in the fridge for up to four days. This keeps flavors intact and prevents spoilage.
Reheating Instructions
When you’re ready to eat, take the curry out of the fridge. You can heat it in a pot over low heat. Stir it often to ensure it heats evenly. Add a splash of coconut milk if it seems too thick. You can also microwave it in a safe dish. Heat it in short bursts, stirring in between.
Freezing Tips
For longer storage, freeze the chickpea coconut curry. Use freezer-safe containers or bags. Make sure to leave some space for expansion. It can last up to three months in the freezer. When ready to eat, thaw it overnight in the fridge. Reheat it like before, and enjoy!
FAQs
How long does Chickpea Coconut Curry last in the fridge?
Chickpea coconut curry lasts about 3 to 4 days in the fridge. Store it in an airtight container. This helps keep it fresh and tasty. The flavors will deepen over time, making it even better!
Can I make this curry ahead of time?
Yes, you can make this curry ahead of time. It actually tastes great after sitting for a while. Prepare it a day or two in advance. Just reheat it on the stove when you are ready to eat.
Is Chickpea Coconut Curry gluten-free?
Yes, chickpea coconut curry is gluten-free. All the ingredients, like chickpeas and coconut milk, do not contain gluten. This makes it a safe choice for anyone with gluten sensitivities. Enjoy this dish worry-free!
This blog post covered how to make Chickpea Coconut Curry. We explored key ingredients, cooking steps, and tips for a great dish. You can adjust spice levels and choose from vegan or meat options. Storage tips and FAQs help you plan ahead and enjoy leftovers.
Remember, cooking is about fun and creativity. Use this guide to make delicious curry whenever you wan