Are you ready to dive into the delicious world of Japanese Katsu Rice Bowls? These flavorful and crispy delights are incredibly satisfying and fun to make. With a few simple ingredients, you can create a meal that bursts with taste. Join me as I guide you through every step, from selecting the right chicken to presenting a stunning bowl. Let’s make your cooking skills shine with this delicious recipe!
Why I Love This Recipe
- Easy to Make: This recipe requires minimal ingredients and simple steps, making it perfect for both beginners and experienced cooks.
- Flavorful & Crunchy: The combination of crispy panko and flavorful chicken creates a delightful texture and taste that everyone will love.
- Customizable Toppings: You can easily add your favorite vegetables or sauces, allowing you to personalize each bowl to your liking.
- Perfect for Meal Prep: These rice bowls are great for meal prepping, providing a delicious and balanced meal that can be enjoyed throughout the week.
Ingredients
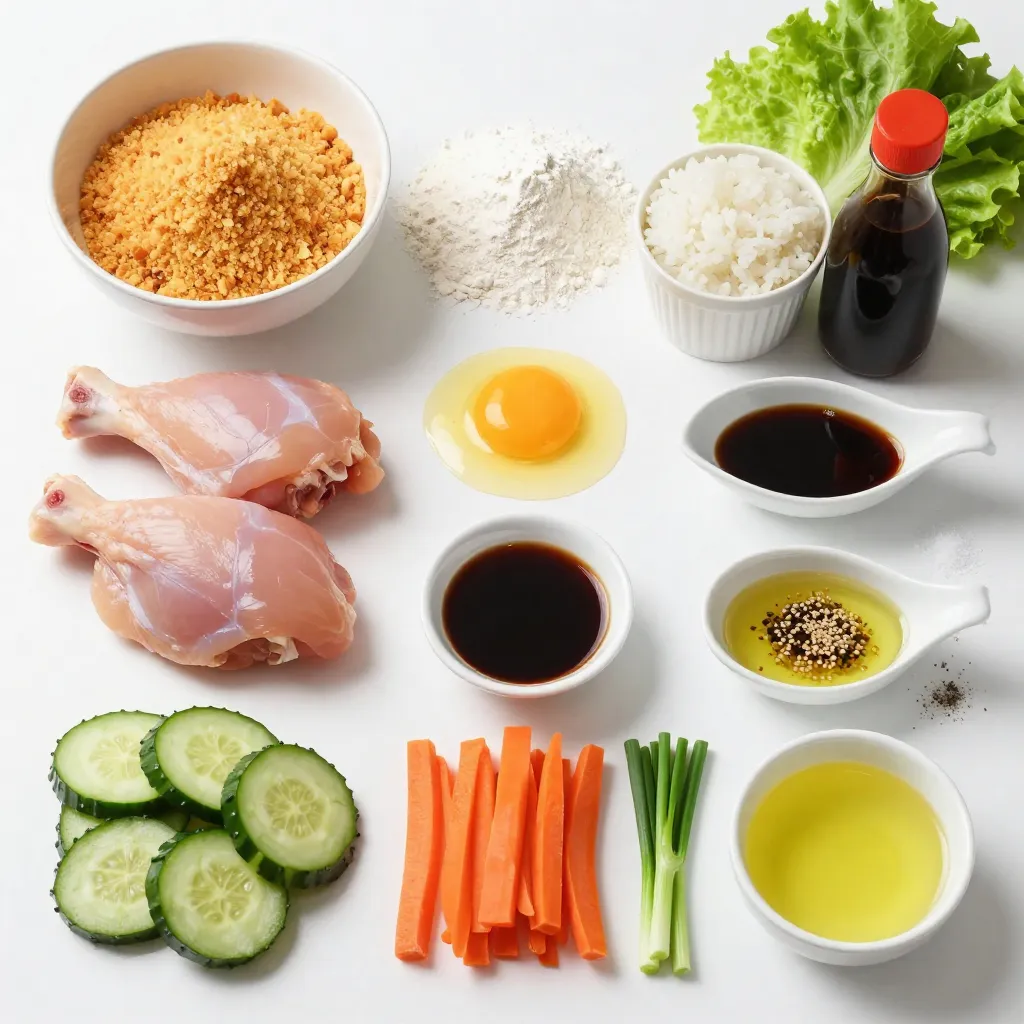
List of Essential Ingredients
– 2 boneless chicken thighs
– 1 cup panko breadcrumbs
– 1/2 cup all-purpose flour
– 1 large egg, beaten
– 1 cup cooked sushi rice
– Salt and pepper to taste
– Oil for frying
These ingredients are the heart of the dish. The chicken thighs give you juicy meat, while panko breadcrumbs add crunch. The flour helps the egg and breadcrumbs stick well. Don’t forget to season with salt and pepper for extra flavor!
Optional Ingredients for Enhanced Flavor
– 1/4 cup tonkatsu sauce
– 2 tablespoons soy sauce
– 1 teaspoon sesame oil
– 1/2 cucumber, thinly sliced
– 1 carrot, julienned
– 2 green onions, chopped
– Lettuce leaves for garnish
These optional ingredients can elevate your katsu rice bowls. Tonkatsu sauce adds a sweet and tangy taste. Soy sauce brings umami, while sesame oil adds a nutty flavor. Fresh veggies like cucumber and carrot make the dish look good and taste fresh.
Recommended Tools
– Large skillet
– Meat mallet or rolling pin
– Three shallow bowls
– Spatula
– Paper towels
You need these tools to make the process easy. The skillet is for frying the chicken. A meat mallet helps you pound the chicken evenly. Shallow bowls keep your breading station organized. The spatula is perfect for mixing the rice. Lastly, paper towels help drain excess oil from the chicken.
Step-by-Step Instructions
Preparing the Chicken
To start, I take two boneless chicken thighs. I place them between two sheets of plastic wrap. Then, I gently pound them with a meat mallet until they are about half an inch thick. This step helps the chicken cook evenly. After that, I season both sides with salt and pepper. It adds great flavor to the chicken.
Setting Up the Breading Station
Next, I set up my breading station. I grab three shallow bowls and arrange them in a row. In the first bowl, I pour in half a cup of all-purpose flour. In the second bowl, I add one beaten egg. In the third bowl, I put in one cup of panko breadcrumbs. I make sure the breadcrumbs are spread out evenly for easy coating.
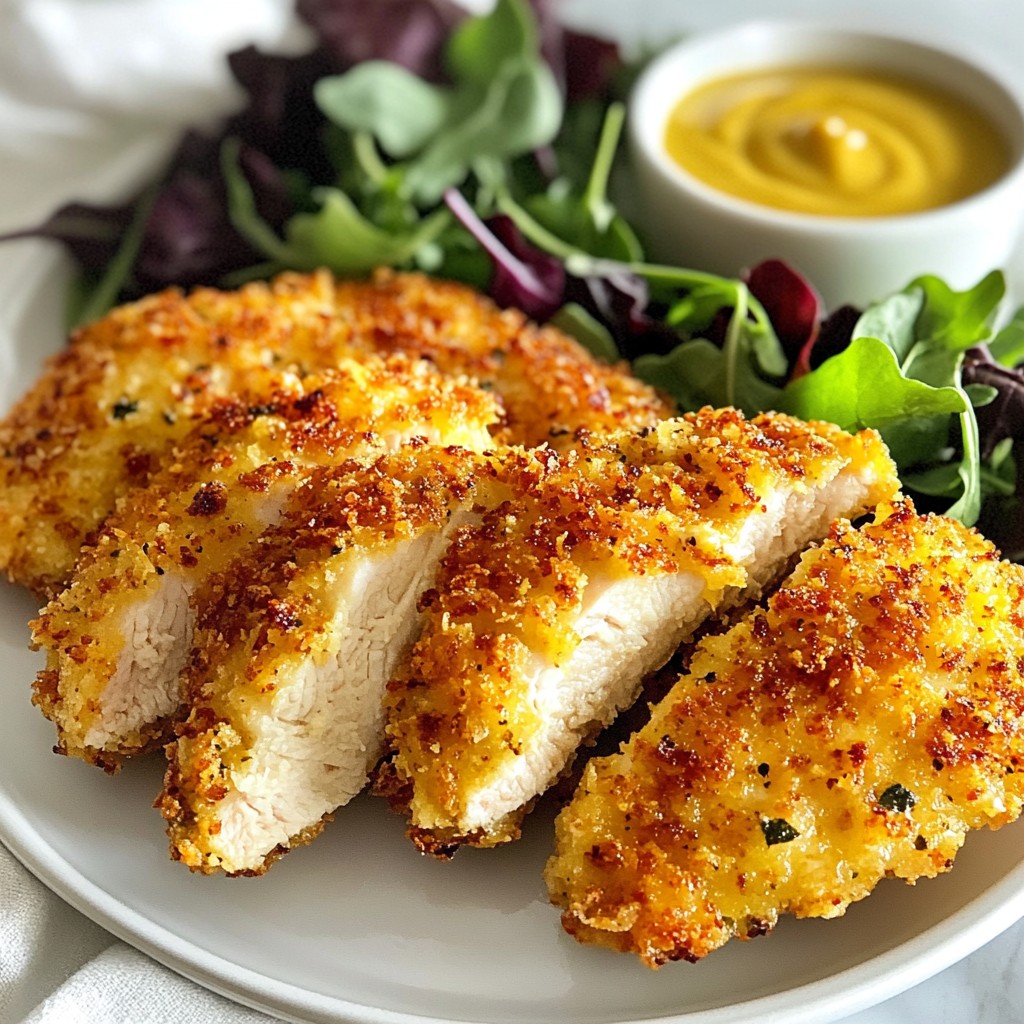
Cooking the Chicken Katsu
Now it’s time to cook! I heat a large skillet over medium heat and add about a quarter-inch of cooking oil. I wait until the oil is shimmering. Carefully, I add the breaded chicken thighs to the hot oil. I cook them for four to five minutes on each side. They should turn golden brown. I check the internal temperature; it should reach 165°F (75°C). Once done, I place the chicken on a plate lined with paper towels to remove excess oil.
Tips & Tricks
Techniques for Perfectly Crispy Katsu
To get that crispy katsu, you need the right steps. Start with fresh chicken thighs. Pound them flat to a half-inch thick. This helps them cook evenly. Season both sides with salt and pepper. This adds flavor.
Next, set up a breading station. You’ll need three shallow bowls. Put flour in the first bowl, beaten egg in the second, and panko breadcrumbs in the third. For breading, coat the chicken in flour first. Shake off the extra flour. Then dip it in the egg. Lastly, press it into the panko. Make sure to cover it well.
When frying, heat oil to medium. It should shimmer, not smoke. This means it’s hot enough. Cook the katsu for 4-5 minutes on each side. Look for a golden brown color. Check the internal temperature. It should reach 165°F. Transfer cooked katsu to paper towels to drain extra oil.
Flavoring the Rice Properly
Flavoring sushi rice makes a big difference. After cooking the rice, move it to a bowl. Drizzle soy sauce and sesame oil over the rice. Use a spatula to mix gently. Be careful not to mash the rice. You want the grains to stay intact. This step adds a nice umami taste.
For extra flavor, consider mixing in a bit of rice vinegar. This gives a slight tang that enhances the dish. Try different amounts to find your perfect balance.
Presentation Tips
Presentation matters, especially for rice bowls. Use deep bowls to layer ingredients. Start with a base of seasoned sushi rice. Lay the sliced katsu on top. Arrange them neatly for a clean look.
Add the thin cucumber and julienned carrot on the side. This adds color and crunch. Sprinkle green onions on top for freshness. Finally, drizzle tonkatsu sauce over the katsu. Garnish with lettuce leaves for a pop of green. A well-presented bowl makes the meal even more appetizing!
Pro Tips
- Even Thickness: Pound the chicken thighs to an even thickness to ensure they cook uniformly and remain juicy.
- Perfect Breading: Press the panko breadcrumbs firmly onto the chicken for a thicker, crunchier coating that holds up during frying.
- Oil Temperature: Make sure the oil is hot enough before adding the chicken. A temperature of 350°F (175°C) will help achieve a crispy exterior.
- Fresh Toppings: Adding fresh vegetables like cucumber and carrot not only enhances the flavors but also adds a refreshing crunch to your rice bowl.
Variations
Alternative Proteins
You can switch up the protein in your katsu rice bowl. Pork katsu is a popular choice. It has a rich flavor and pairs well with tonkatsu sauce. If you want a lighter option, try tofu katsu. Just slice firm tofu and bread it like chicken. For seafood lovers, shrimp katsu works great too. It cooks quickly and tastes amazing with the same crispy coating.
Rice Alternatives
While sushi rice is traditional, you can try other grains. Brown rice adds more fiber and has a nutty taste. Quinoa is another good option. It cooks fast and is packed with protein. You can even use cauliflower rice for a low-carb version. Each choice gives a new twist to your bowl.
Topping Variations
Don’t be afraid to get creative with your toppings! You can add sautéed mushrooms or bell peppers for extra flavor. Try drizzling spicy mayo or teriyaki sauce over your bowl. Fresh herbs like cilantro or basil can brighten the dish. Mix and match to find your favorite combos!
Storage Info
Storing Leftovers
To keep your chicken katsu rice bowls fresh, store leftovers in airtight containers. Separate the chicken from the rice and veggies. This keeps everything crisp. Place the chicken in one container and the rice and toppings in another. Keep them in the fridge for up to three days. Always let the food cool before sealing.
Reheating Instructions
To reheat, use an oven for best results. Preheat your oven to 350°F (175°C). Place the chicken on a baking sheet. Heat for 10-15 minutes until warm. This keeps the katsu crispy. For rice, sprinkle a little water over it in a microwave-safe bowl. Cover with a damp paper towel and heat for 1-2 minutes. Stir and check if it’s hot.
Freezing Tips
You can freeze chicken katsu rice bowls, but do it right. Wrap the chicken tightly in plastic wrap, then place it in a freezer bag. Store rice and veggies in separate bags. Use within three months for best flavor. To thaw, move to the fridge overnight before reheating. This method helps maintain texture and taste.
FAQs
What is the origin of Katsu Rice Bowls?
Katsu Rice Bowls come from Japan. The word “katsu” means cutlet. This dish is popular for its crispy texture and delicious flavor. Katsu started with pork cutlets in the late 19th century. It grew from Western influences on Japanese food. Now, chicken katsu is just as loved. Katsu Rice Bowls are often served with rice and vegetables. They are a staple in many Japanese homes and restaurants. Enjoying katsu is a way to celebrate comfort food in Japan.
Can I use a different meat for the katsu?
Yes, you can use different meats for katsu. While pork is traditional, chicken is also common. You can try beef, shrimp, or even tofu for a vegetarian option. Each meat gives a different flavor and texture. Choose what you like best. Adjust cooking times based on the meat you pick. For example, shrimp cooks faster than chicken. Experimenting with meats can make your katsu bowls more exciting.
What can I substitute for tonkatsu sauce?
If you don’t have tonkatsu sauce, don’t worry! You can make a quick substitute. Mix soy sauce, ketchup, and a bit of sugar for a sweet and tangy flavor. Another option is to use barbecue sauce, which adds a smoky taste. You can also try homemade sauces. Combine Worcestershire sauce, soy sauce, and some honey for a tasty mix. These substitutes keep your katsu rice bowls delicious even without tonkatsu sauce.
In this post, I covered the essential ingredients, preparation steps, and tips for making chicken katsu rice bowls. You learned about variations and how to store leftovers properly. Each section aimed to make the cooking process easier and more enjoyable. Remember, you can customize the flavors to fit your taste. Don’t be afraid to try different proteins or sauces. With practice, your katsu will impress everyone. Enjoy your cooking journey and have fun exploring new idea