Get ready to delight your taste buds with my Peppermint Candy Spoons! These colorful treats are perfect for the holidays. You’ll learn how to make them from scratch, with simple ingredients and easy steps. Whether you want to gift them or enjoy them yourself, these candy spoons will bring cheerful flavors to your celebrations. Let’s dive into the fun of making these sweet delights together!
Why I Love This Recipe
- Festive Fun: These peppermint candy spoons are a delightful treat, perfect for holiday gatherings and celebrations.
- Easy to Make: With just a few simple ingredients and steps, anyone can whip up these charming spoons in no time.
- Customizable: You can easily adjust the flavor by using different extracts or toppings, making them versatile for any occasion.
- Great Gift Idea: Packaged nicely, these candy spoons make thoughtful and unique gifts for friends and family during the holidays.
Ingredients
Main Ingredients for Peppermint Candy Spoons
– 1 cup crushed peppermint candies (or candy canes)
– 2 tablespoons semi-sweet chocolate chips
– 1 teaspoon coconut oil
– 1 teaspoon peppermint extract
– 10 plastic or wooden spoon handles
These main ingredients create the sweet base for your peppermint candy spoons. The crushed peppermint candies give a strong minty flavor. The chocolate adds richness, while the coconut oil helps the chocolate melt smoothly. The peppermint extract boosts the minty taste, and the spoon handles make it all come together.
Optional Ingredients to Enhance Flavor
– Sea salt (for a sweet and salty mix)
– White chocolate (for a different chocolate flavor)
– Crushed nuts (for extra crunch)
Adding sea salt can make your spoons even tastier. White chocolate offers a nice contrast to the mint. Crushed nuts add texture and flavor, making your spoons unique.
Recommended Tools and Equipment
– Baking sheet
– Parchment paper
– Medium mixing bowl
– Microwave-safe bowl
– Spoon for scooping
Using these tools helps make the process easier. The baking sheet and parchment paper prevent sticking. A good mixing bowl is key for combining your ingredients well. The microwave-safe bowl ensures safe melting of chocolate. A sturdy spoon helps you scoop the peppermint mixture efficiently.

Step-by-Step Instructions
Preparation: Preheat the Oven and Prepare Baking Sheet
Start by preheating your oven to 350°F (175°C). This will help the spoons bake evenly. While the oven heats, line a baking sheet with parchment paper. This paper stops the candy from sticking.
Mixing: Combine Ingredients for Candy Mixture
In a medium bowl, mix 1 cup of crushed peppermint candies with 1 teaspoon of peppermint extract. Stir well. This step ensures that the mint flavor is strong in each spoon.
Baking: Shape, Bake, and Cool the Peppermint Spoons
Next, scoop the peppermint mixture with a spoon. Form small mounds, about 1-2 tablespoons, and place them on the baking sheet. Leave space between them, as they will spread. Bake for 7-10 minutes. Watch for the edges to melt. After baking, let the peppermint spoons cool completely on the sheet.
Chocolate Coating: Melting and Dipping Process
While the spoons cool, prepare the chocolate. In a microwave-safe bowl, mix 2 tablespoons of semi-sweet chocolate chips and 1 teaspoon of coconut oil. Microwave for 15 seconds at a time. Stir after each interval until smooth.
Final Touches: Setting and Presentation
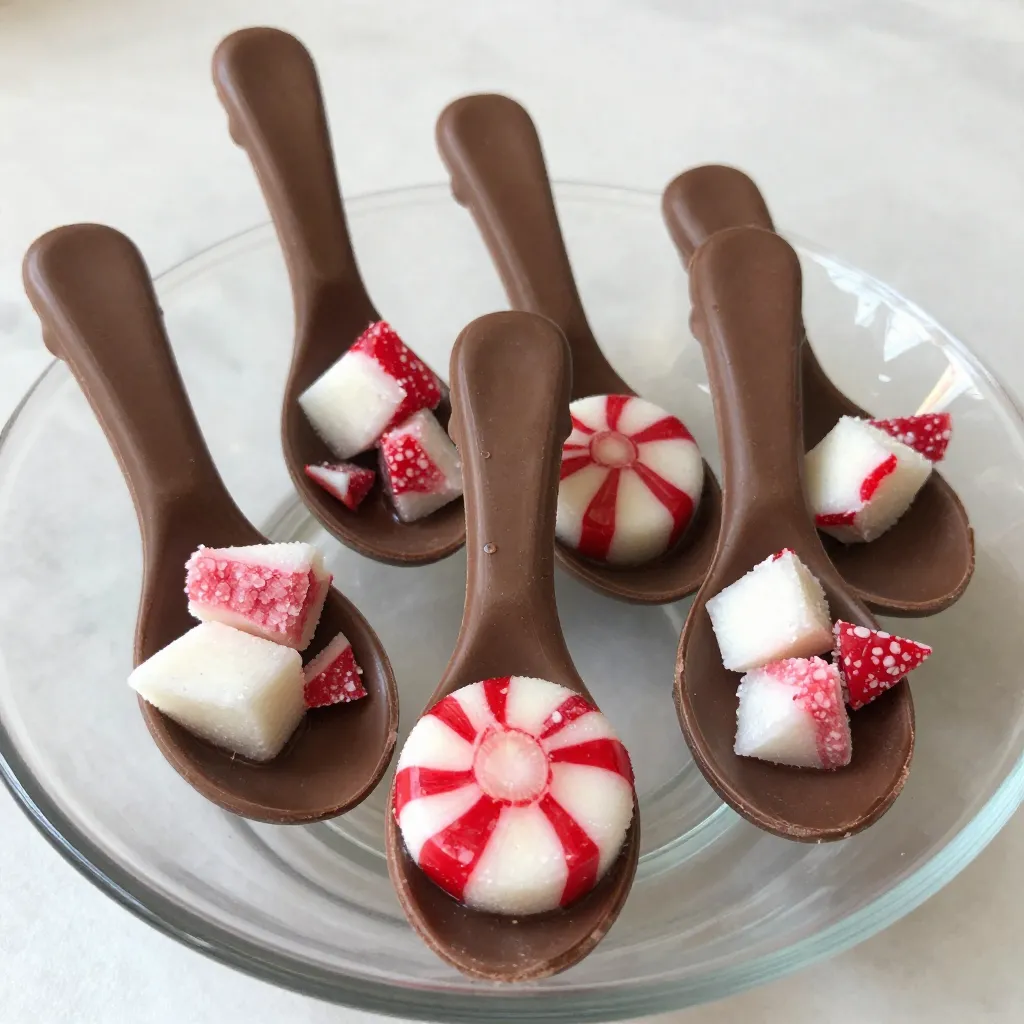
Once the peppermint spoons have cooled, dip the top of each spoon into the melted chocolate. Let any extra chocolate drip back into the bowl. Place them back on the parchment paper. They can sit at room temperature or go in the fridge to harden quickly. After the chocolate sets, your peppermint candy spoons are ready! For a lovely touch, arrange them in a mason jar or use clear cupcake liners for gifts.
Tips & Tricks
Baking Tips for Perfectly Formed Spoons
To make sure your peppermint candy spoons come out just right, follow these tips:
– Crush candies finely: Smaller pieces melt better and hold shape.
– Space them out: Leave enough room on the baking sheet. They will spread while baking.
– Watch the oven: Keep an eye on them. They need to melt but not burn.
How to Store Leftover Peppermint Candy Spoons
If you have extras, store them well to keep the taste fresh. Here’s how:
– Use an airtight container: This keeps them from getting stale.
– Keep in a cool place: Avoid heat and sunlight to maintain firmness.
– Layer with parchment paper: This prevents sticking if you stack them.
Presentation Ideas for Gifting
These spoons make great gifts! Here are some fun ideas for presenting them:
– Mason jars: Fill a jar with spoons and tie a ribbon around it.
– Cupcake liners: Place each spoon in a colorful liner for a festive touch.
– Gift bags: Wrap them in clear bags with a tag to share the joy.
Pro Tips
- Use Fresh Peppermint Extract: For the best flavor, opt for high-quality, pure peppermint extract instead of imitation flavoring.
- Cooling Time is Key: Allow the peppermint spoons to cool completely before dipping in chocolate to maintain their shape and texture.
- Experiment with Chocolate: Try using white or dark chocolate for a different flavor profile and visual appeal.
- Storage Tips: Store your finished peppermint spoons in an airtight container at room temperature to keep them fresh and maintain their texture.
Variations
Flavor Variations: Experimenting with Extracts
You can change the flavor of your peppermint candy spoons easily. Try different extracts like vanilla or almond. Just swap out the peppermint extract with 1 teaspoon of your chosen flavor. This adds a unique twist to your treats. Each flavor gives a special touch that kids and adults will love.
Using Different Types of Baking Chocolate
When it comes to chocolate, you have options! Use dark chocolate for a richer taste, or white chocolate for a sweeter flavor. You can also mix chocolates for a fun look. Each type of chocolate will change how the spoons taste. Just melt and dip as you normally would.
Decorating Options: Sprinkles and Drizzles
Decorating your peppermint spoons can be so much fun! After dipping in chocolate, add colorful sprinkles for a festive look. You can also drizzle extra melted chocolate on top for a fancy touch. Let your creativity shine! These little details make your candy spoons extra special and appealing.
Storage Info
Best Practices for Storing Peppermint Candy Spoons
To keep your peppermint candy spoons fresh, store them in an airtight container. This will help prevent moisture from getting in. Place parchment paper between layers if stacking them. Always keep the container in a cool, dry place, away from direct sunlight. Avoid areas with high humidity, as this can cause the candy to become sticky.
Shelf Life and Signs of Spoilage
Peppermint candy spoons usually last about two weeks when stored correctly. If you notice any changes in texture or smell, it’s best to toss them. Signs of spoilage include stickiness, melting, or an off smell. Always check before serving.
Freezing Options for Longer Storage
You can freeze peppermint candy spoons for longer storage. Wrap each spoon in plastic wrap and place them in a freezer bag. They can last up to three months in the freezer. When ready to use, thaw them in the fridge overnight for the best results. Do not refreeze after thawing.
FAQs
How long do peppermint candy spoons last?
Peppermint candy spoons stay fresh for about two weeks. Store them in an airtight container. Keep them in a cool, dry place. If they are exposed to moisture, they may become sticky.
Can I use different types of candy for the spoons?
Yes, you can use various candies! Hard candies work well. Try using crushed chocolate mints or even butterscotch candies. This adds fun flavors to your spoons. Just remember to follow the same melting and shaping steps.
What beverages pair best with peppermint candy spoons?
Peppermint candy spoons taste great with hot chocolate, coffee, or tea. The minty flavor adds a festive twist. They can also be stirred into milk for a sweet treat. Don’t forget to try them with homemade eggnog!
Are peppermint candy spoons kid-friendly?
Absolutely! Peppermint candy spoons are fun for kids. They can enjoy making and eating them. Just be careful with hot chocolate and melted chocolate. Supervise younger kids when they use spoons or dip candies.
Where can I buy ready-made peppermint candy spoons?
You can find ready-made peppermint candy spoons at some specialty candy shops. Check local bakeries or holiday markets too. Online stores like Etsy or Amazon often have them. Just make sure to read reviews to find the best quality!
You can make tasty peppermint candy spoons at home. We covered the main ingredients, optional flavors, and recommended tools. I provided a step-by-step guide for preparation, baking, and coating. Plus, I shared tips for perfect spoons and fun presentation ideas. Don’t forget to try flavor variations and learn about storage options for long-lasting treats. These spoons are fun to make, share, and enjoy. With a bit of creativity, you’ll impress friends and family. Enjoy your sweet creations and have fun experimentin